Work by Location

South-East-London-Tile-Doctor

Welcome to my Work History archive where you will find detailed examples of Tile, Grout and Stone Cleaning and renovation work carried out within South East London.

I have organised the posts by the most populous locations throughout South East London, if I haven’t listed your location do get in touch, Tile Doctor covers the whole country so if I can’t cover it there’s a good chance one of my colleagues can.

Local towns and villages I cover include: Abbey Wood, Anerley, Avery Hill, Bankside, Beckenham, Bellingham, Bermondsey, Bickley, Blackheath, Bostall Heath and Woods, Brixton, Brockley, Camberwell, Catford, Charlton, Chelsfield, Chinbrook, Chislehurst, Crockenhill, Crofton Park, Crossness, Dartford, Denmark Hill, Deptford, Downe, Downham, Dulwich, Eden Park, Elmers End, Elmstead, Eltham, Evelyn, Falconwood, Farnborough, Forest Hill, Green Street Green, Greenwich, Grove Park, Hayes, Herne Hill, Hextable, Hither Green, Hockenden, Honor Oak, Horn Park, Keston, Kidbrooke, Ladywell, Leaves Green, Lee, Lewisham, Locksbottom, Longlands, Maze Hill, Mottingham, New Cross, New Eltham, Newington, Nunhead, Orpington, Park Langley, Peckham, Peckham Rye, Penge, Perry Vale, Petts Wood, Plumstead, Pratt’s Bottom, Rotherhithe, Royal Arsenal, Rushey Green, Ruxley, Shooter’s Hill, Shortlands, Sidcup, South Bank, South Bermondsey, Southwark, St John’s, St Mary Cray, St Paul’s Cray, Surrey Quays, Swanley, Sydenham, Telegraph Hill, Thamesmead, Tulse Hill, Upper Norwood, Vauxhall, Walworth, Well Hall, Well Hill, West Dulwich, West Heath, West Wickham , Westcombe Park, Woolwich

Encaustic Tiled Bathroom Renovation Blackheath SE3

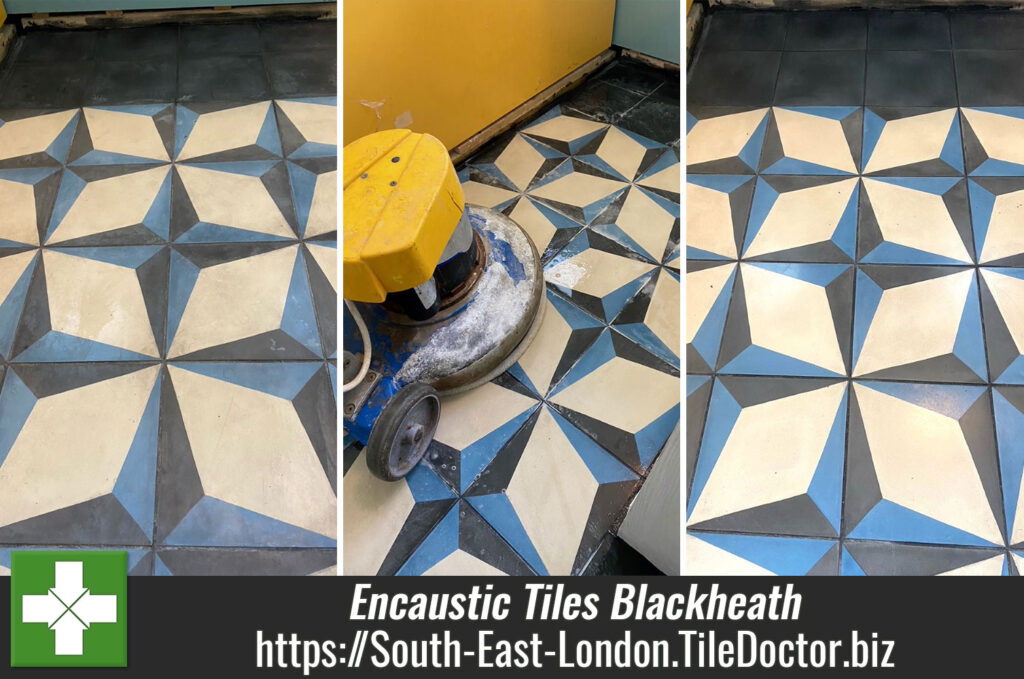
Grout-Stained Encaustic Floor Tiles Renovated in a Blackheath Bathroom

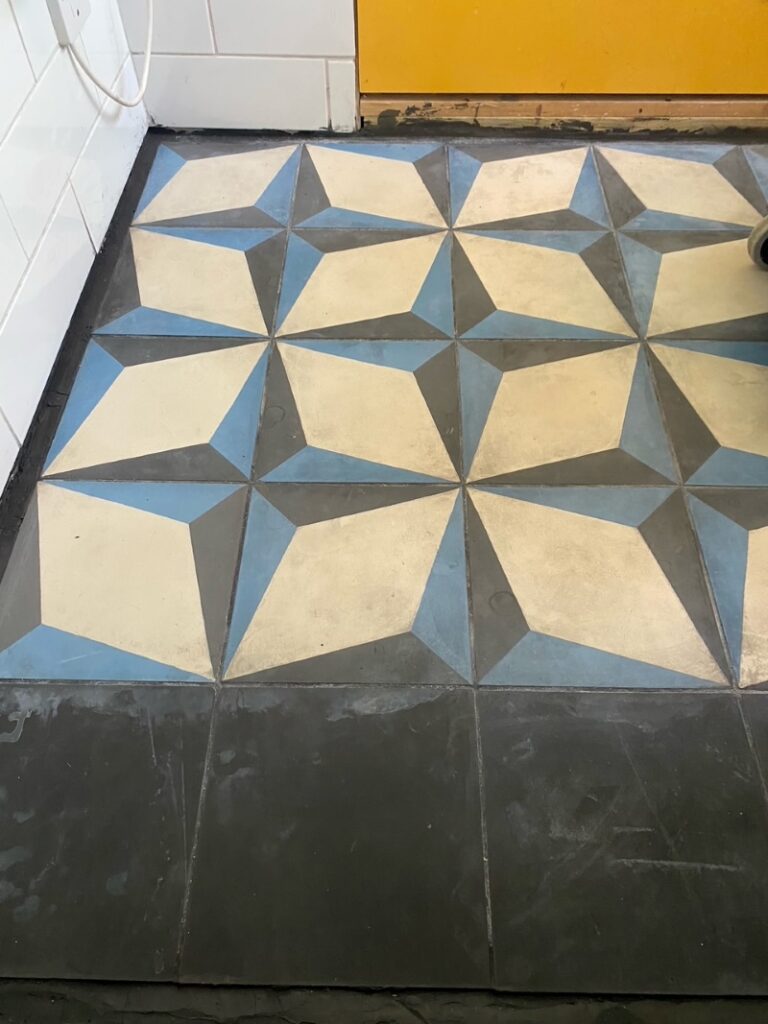
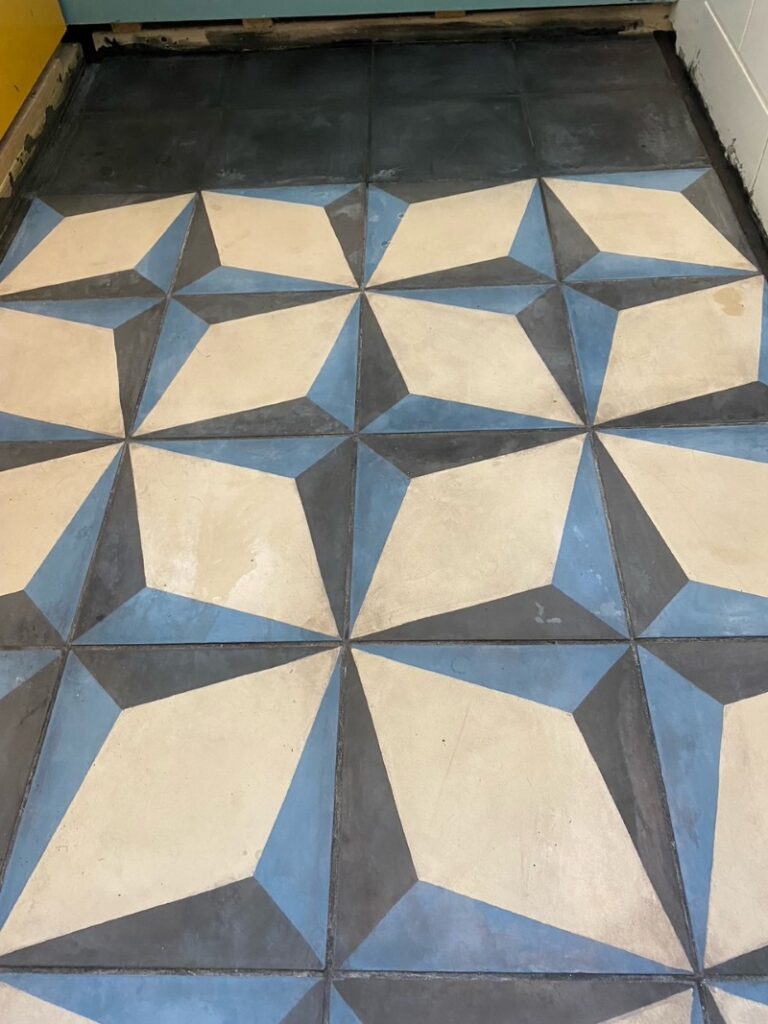
My customer recently had a new bathroom installed in their apartment in Blackheath London, SE3, including all new wall and floor tiles. The tiles they chose for the floor were encaustic cement and laid in a geometric pattern. Unfortunately this type of tile is very porous and because they had not been fully sealed before grouting the Black grout stained the tiles. This made them look dirty and despite great efforts to clean them by the owner nothing appeared to work.

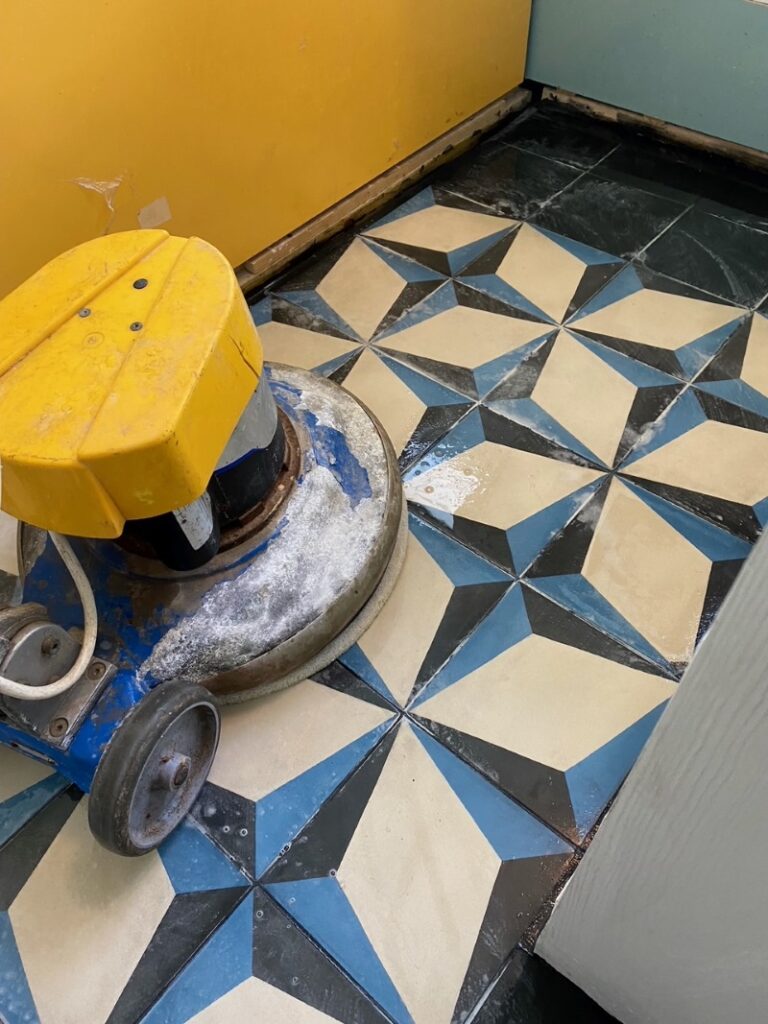
Encaustic Tiled Bathroom Floor Before Cleaning Blackheath SE3 Encaustic Tiled Bathroom Floor Before Cleaning Blackheath SE3

This is a far too common problem; many installers mistake the tiles for ceramic which are glazed and very easy to install. To rectify it requires the tiles to be burnished with different grades of diamond pad, and then sealed to protect them going forward.

I informed the customer what the process would be and worked out a quote for the renovation. Happy that the problem would be resolved the job was booked in.

Cleaning an Encaustic Tiled Bathroom Floor

Work started with the application of a coarse 200-grit diamond pad fitted to a rotary machine. Water is used to lubricate the process and the pad is worked across the floor making sure that it contacts every part of each tile. Once I had covered the whole floor in this manner the now dirty water was extracted with a wet vacuum.

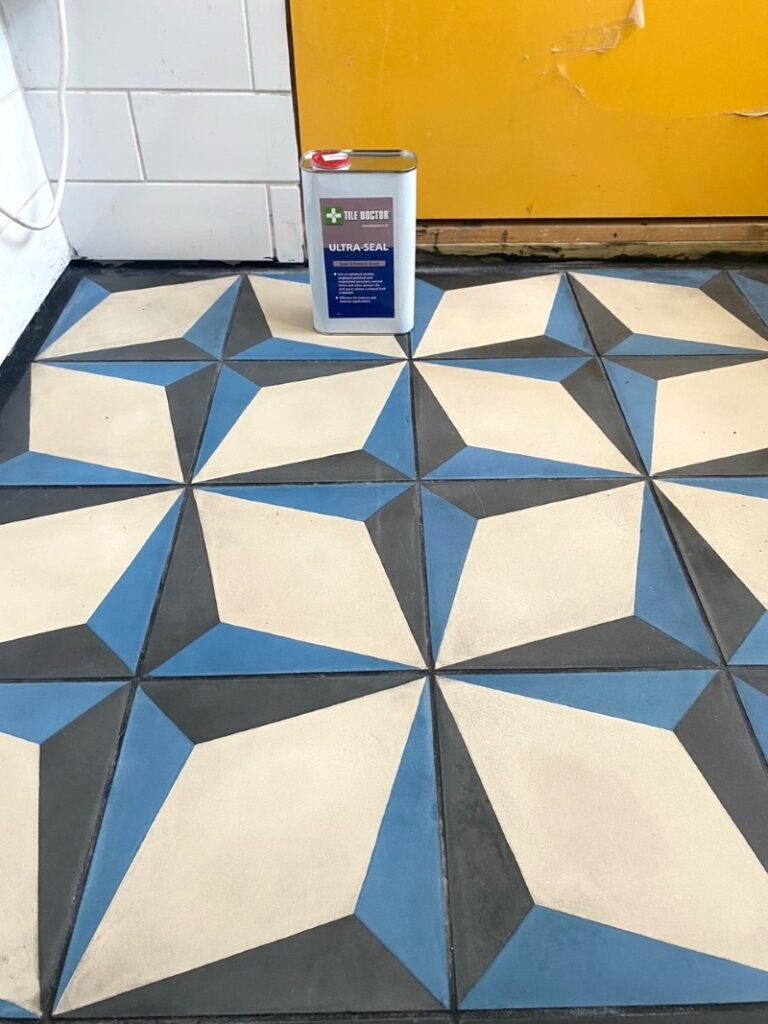
Encaustic Tiled Floor During Cleaning Blackheath SE3 Encaustic Tiled Floor During Sealing Blackheath SE3

This process was then repeated with a full set of diamond burnishing pads with grits from 400 to 3000. These pads gradually refine the tile and slowly build-up a polish on its surface.
The last 3000 grit-pad is applied dry with only a small amount of water sprayed on to the tile thereby leaving the floor dry.

Sealing an Encaustic Tiled Bathroom Floor

The floor was then sealed later that day using four coats of Tile Doctor Ultra-Seal to ensure it was fully sealed. Ultra-Seal is a natural look sealer that works by soaking into the tiles occupying the pores and thereby preventing dirt from becoming ingrained there. This ensure dirt and liquids remain on the surface where they can be easily removed.

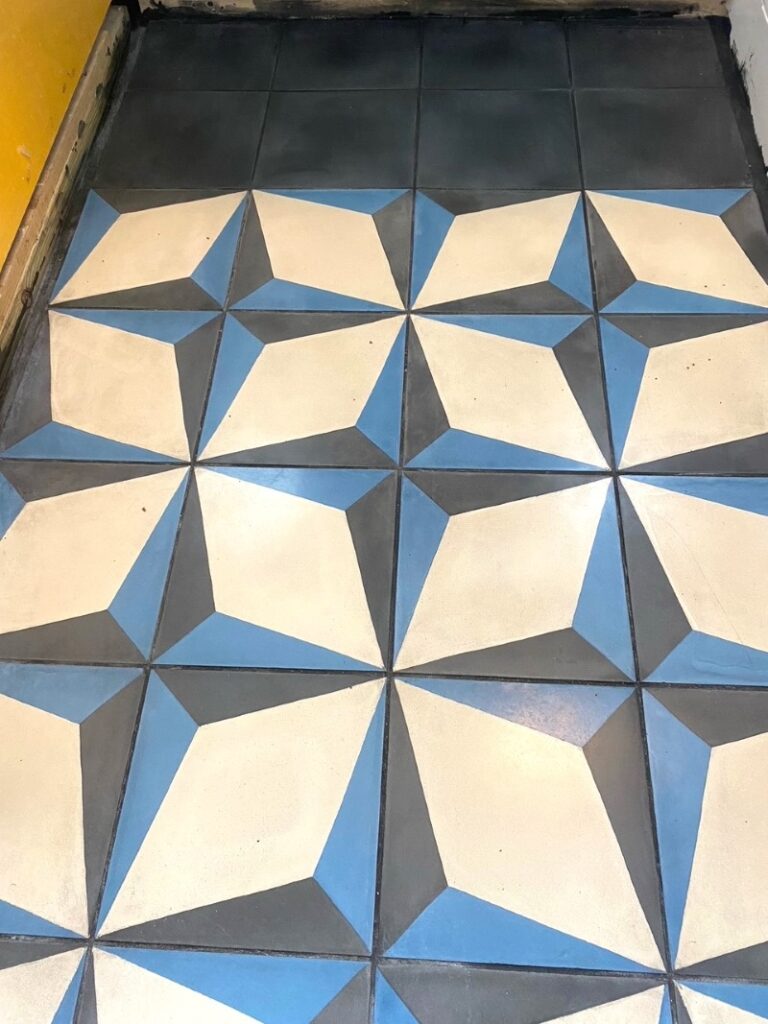
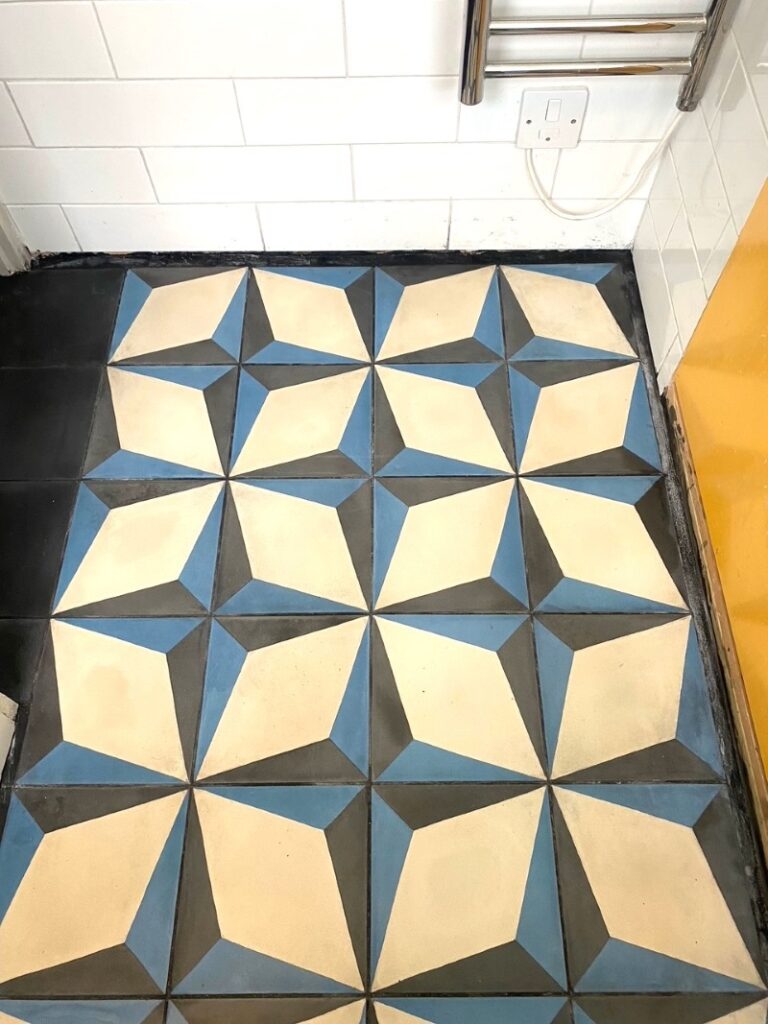
The burnishing removed the staining and added a lovely subtle sheen to the tile. My customer was very pleased with the result and relieved that the problem had been resolved.

Encaustic Tiled Bathroom Floor After Renovation Blackheath SE3 Encaustic Tiled Bathroom Floor After Renovation Blackheath SE3

As long as the sealer remains in place it will ensure they remain easy to clean however you need to be careful what product you clean them with as strong bleach based cleaners will damage the sealer. For this floor I would recommend Tile Doctor Stone Soap which is a gentle yet effective Tile Cleaner that helps maintain the patina on polished tiles.


Professional Restoration of an Encaustic Tiled Bathroom Floor in North Essex

Grout-Stained Encaustic Floor Tiles Renovated in a Blackheath Bathroom Read More »
Victorian Tiled Path Restoration Lewisham

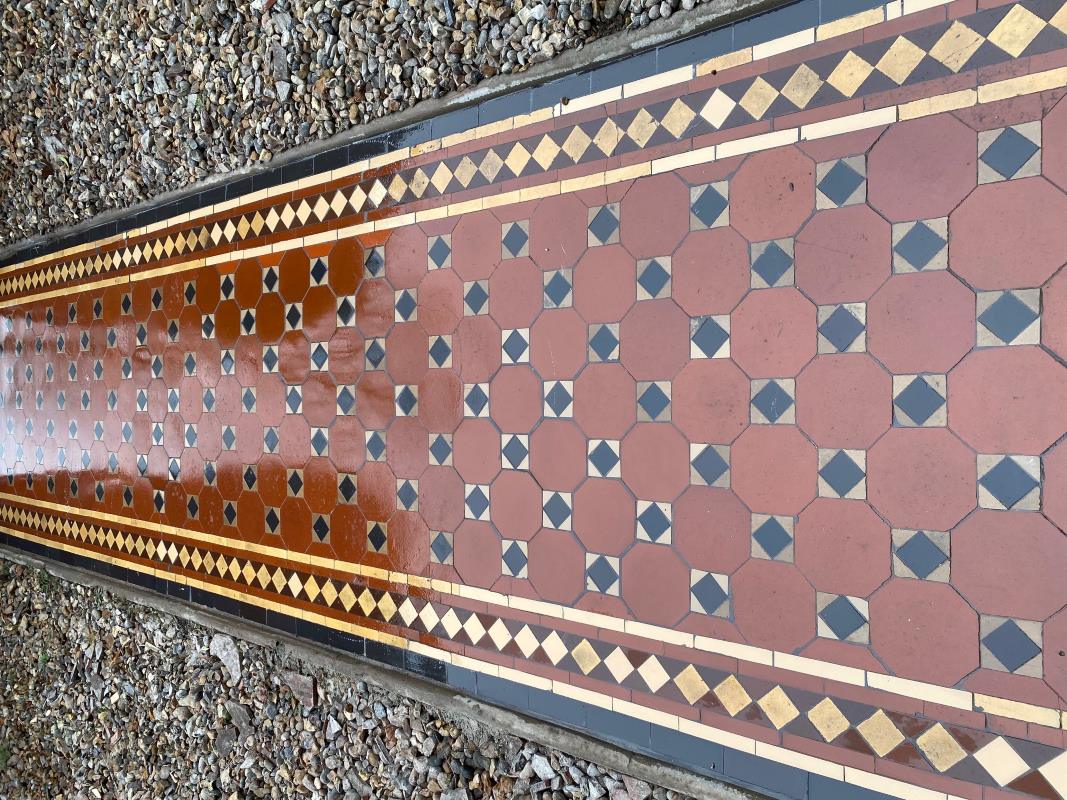
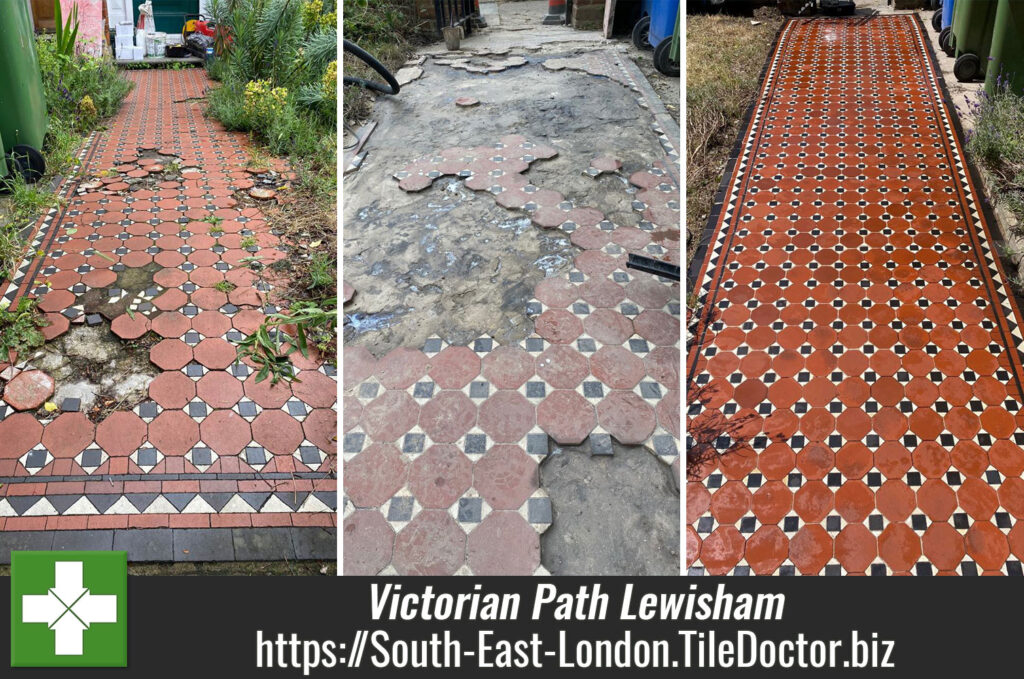
Dilapidated Red and Black Victorian Tiled Path Restored in Lewisham

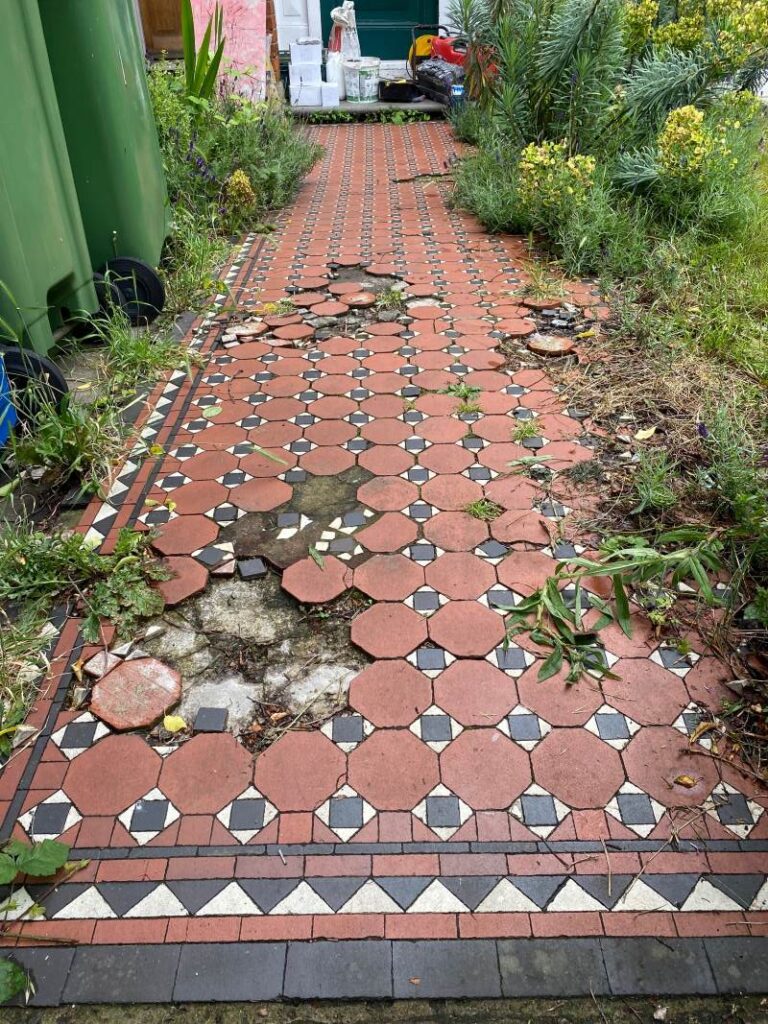
This customer contacted Tile Doctor about the dilapidated Victorian tiled path that led up to their property in in Lewisham. It was in quite a state as your can see from the photographs on this page, tree roots had lifted the tiles in certain areas and there were a lot of loose tiles. Intrigued I offered to come and take a look and see what could be done.

After visiting the property, I could see that as well as tiling, some repairs to the foundation due to the tree roots would be needed but generally the path was in solid condition. Also, there was still a good fall to the path so rainwater would drain away easily.

Victorian Tiled Path Before Restoration Lewisham

Before becoming a Tile Doctor my trade was tiling so I wasn’t put off by the significant amount of tiling that this project needed. I worked out a quote for the work needed which they were happy to accept and we set a tentative date for my return and hoped for good weather.

Repairing a Victorian Tiled Pathway

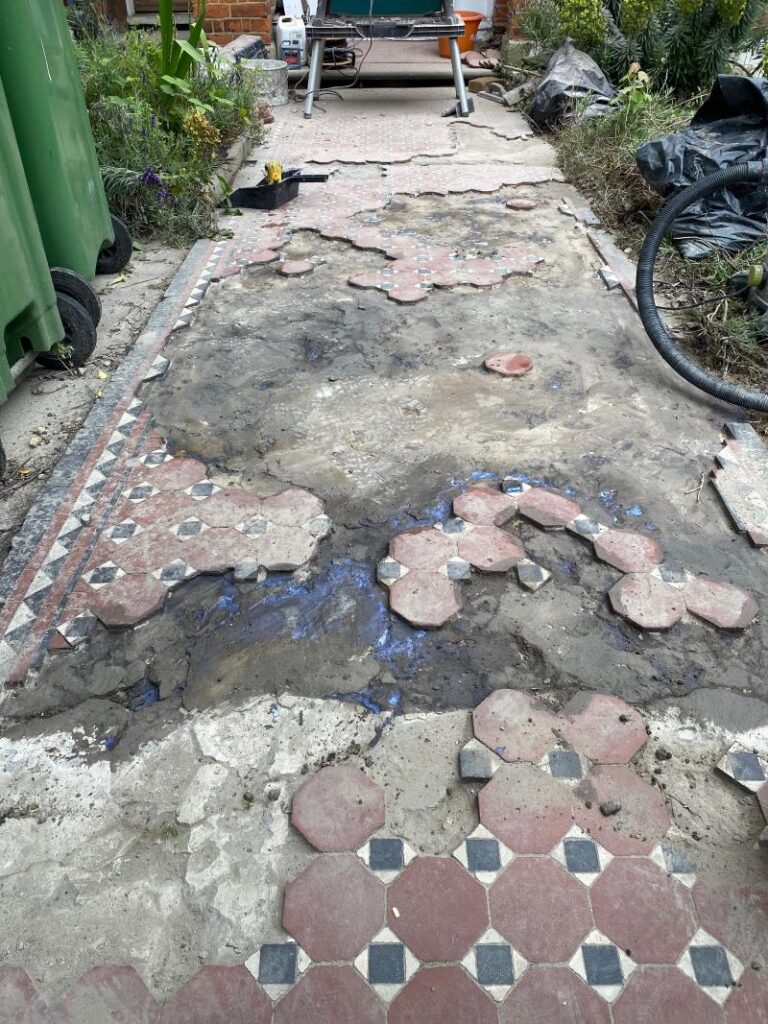
The weather was fine so I was able to start work by carefully lifting all the broken and loose tiles and putting them to one side for re-use where possible. This then exposed the path foundation, which needed digging out in in places and backfilling with cement. I also used a grinder to remove any high spots and leave the foundation base as flat as possible.

Victorian Tiled Path During Restoration Lewisham

Next came the tiling which had to match the existing geometrical pattern. I used a combination of the salvaged tiles from earlier which had to be cleaned up and new reproduction tiles that I had managed to source from a specialist supplier. The tiles were laid out dry initially to ensure the pattern was correct and only then were they fixed in place with new adhesive and then grouted. All these repairs may sound straightforward but the work actually took three days to complete.

Deep Cleaning a Victorian Tiled Pathway

The path was then left to set overnight and I returned later to give them a deep clean. To do this I started with a strong combination of Tile Doctor Remove & Go and Nanotech HBU stain remover. This was sprayed onto the path and left to soak in for a good ten to fifteen minutes to give it time to break down the grime and dirt that had built up over the years. The solution was then scrubbed in using a coarse 50-grit diamond pad fitted to a rotary machine.

The dirt released from the tiles was rinsed off and extracted with a wet vacuum and the process repeated, this time with Tile Doctor Acid Gel and a 100-grit then 200-grit diamond pad. This process deep cleans and hones the tile removing ingrained dirt and improving their appearance. The path was rinsed and soiling extracted afterwards, then left to dry off overnight.

Sealing a Victorian Tiled Pathway

The weather held out and I returned the next day to seal the tiles using three coats of Tile Doctor Colour Grow which is a breathable colour enhancing impregnating sealer. Impregnators work by soaking into the pores of the tile, occupying the pores and thereby preventing dirt from becoming ingrained there.

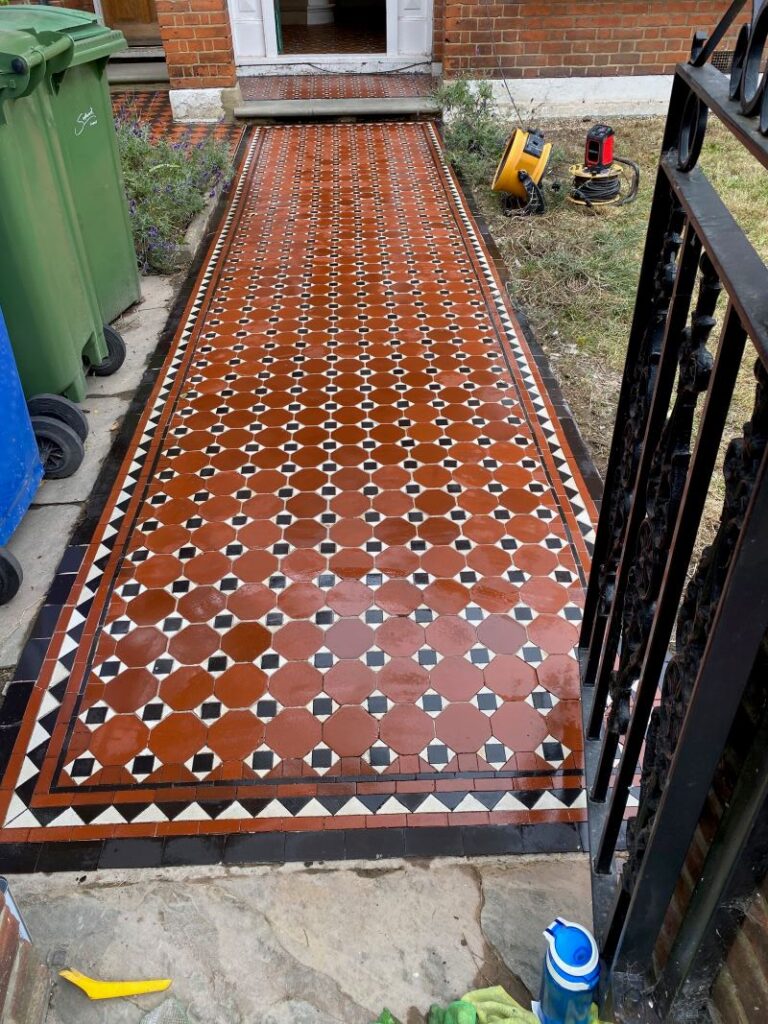
Victorian Tiled Path After Restoration Lewisham

The customer was very pleased with the results and the path has been saved for another 100 years. The new sealer would ensure dirt remains on the surface where it can be easily cleaned away for which I recommended using Tile Doctor Neutral Tile Cleaner.


Professional Restoration of a Victorian Tiled Pathway in Southeast London

Dilapidated Red and Black Victorian Tiled Path Restored in Lewisham Read More »
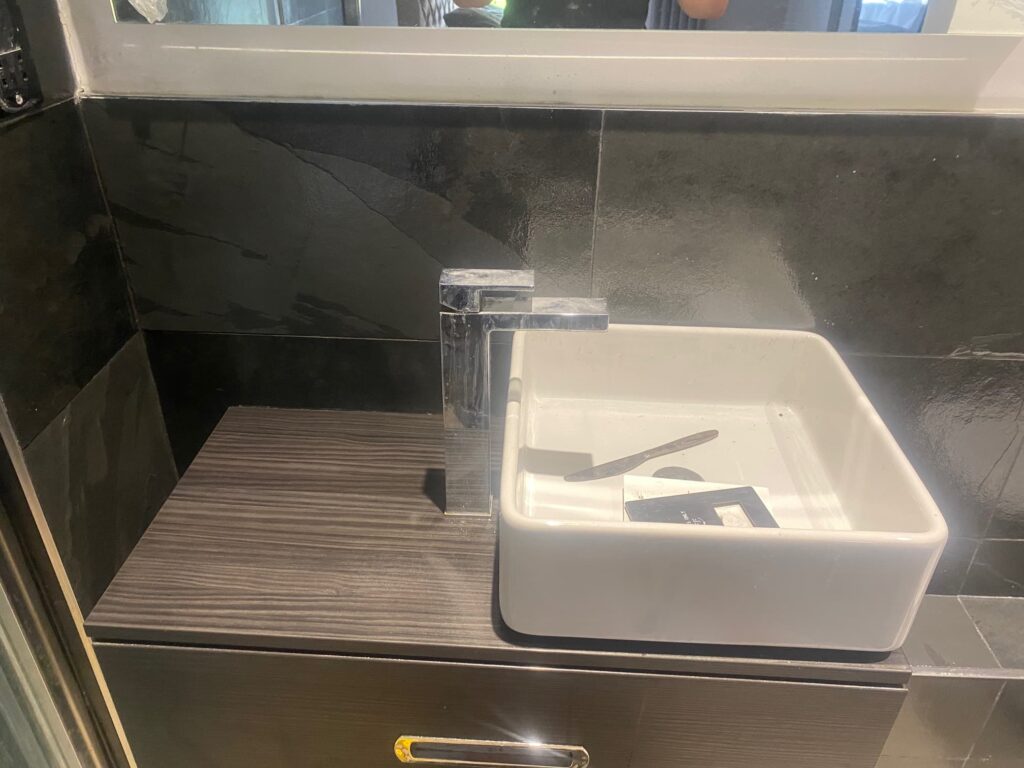
Slate Bathroom Tile Renovation Penge

Damaged Sealer Replaced on Black Slate Wall Tiles in a Penge Bathroom

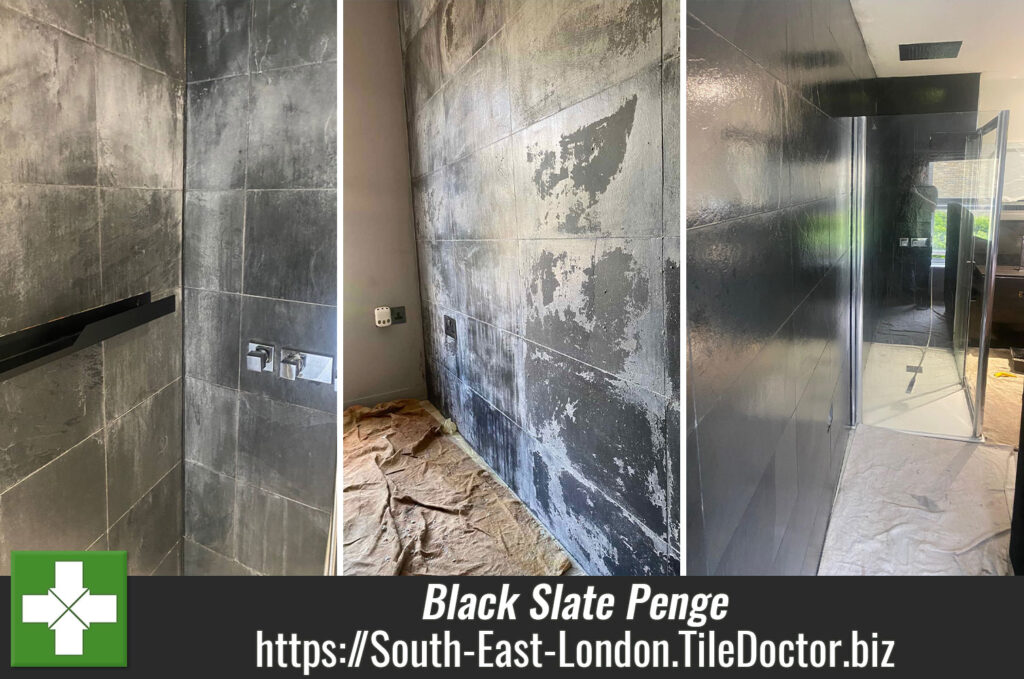
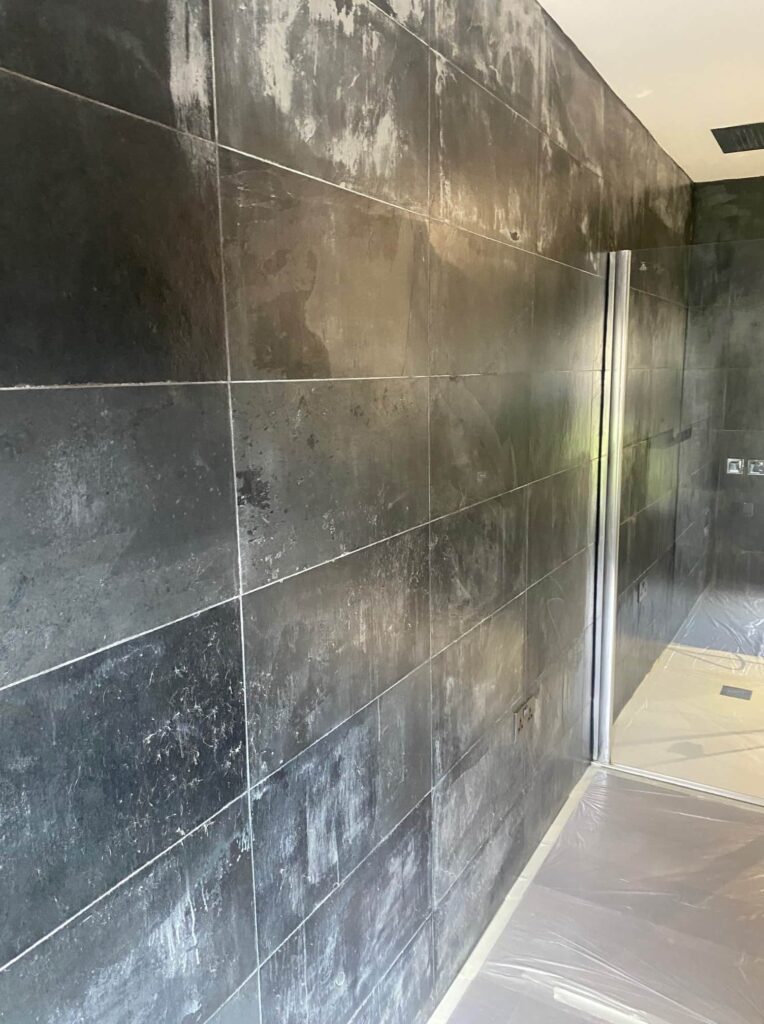
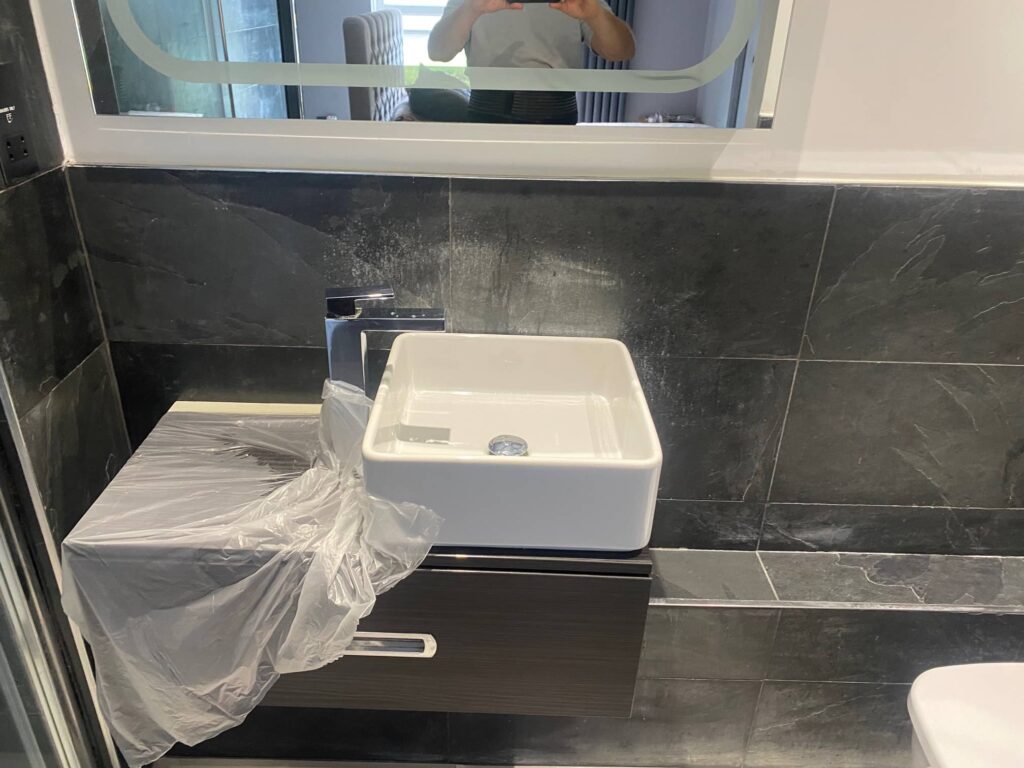
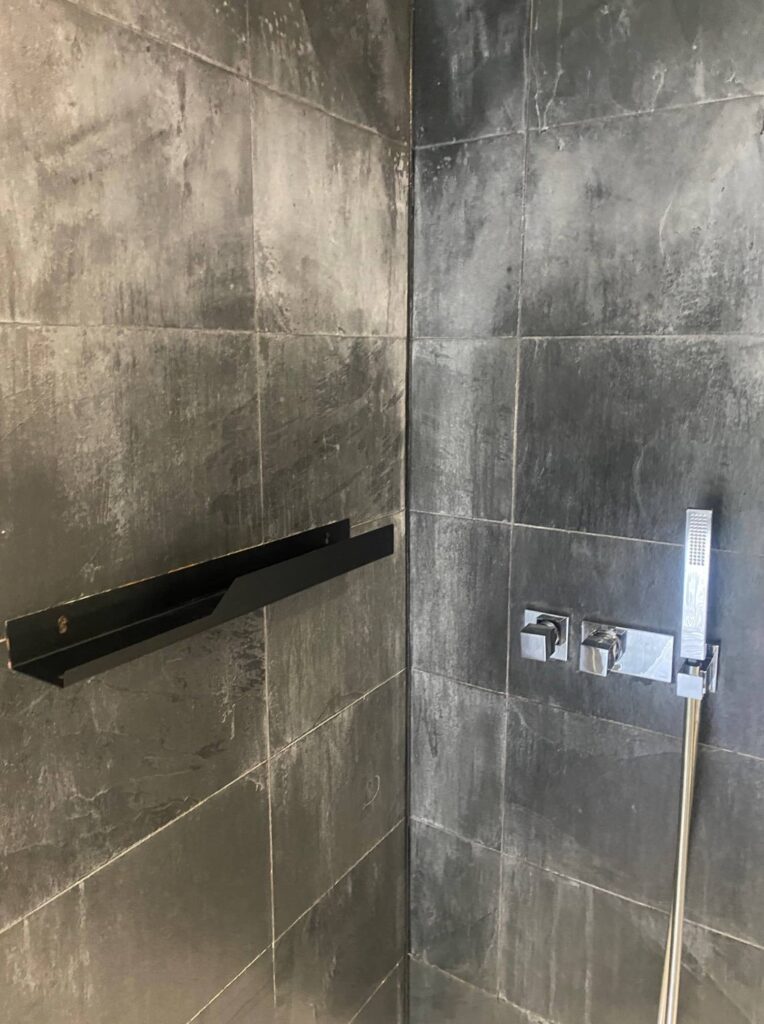
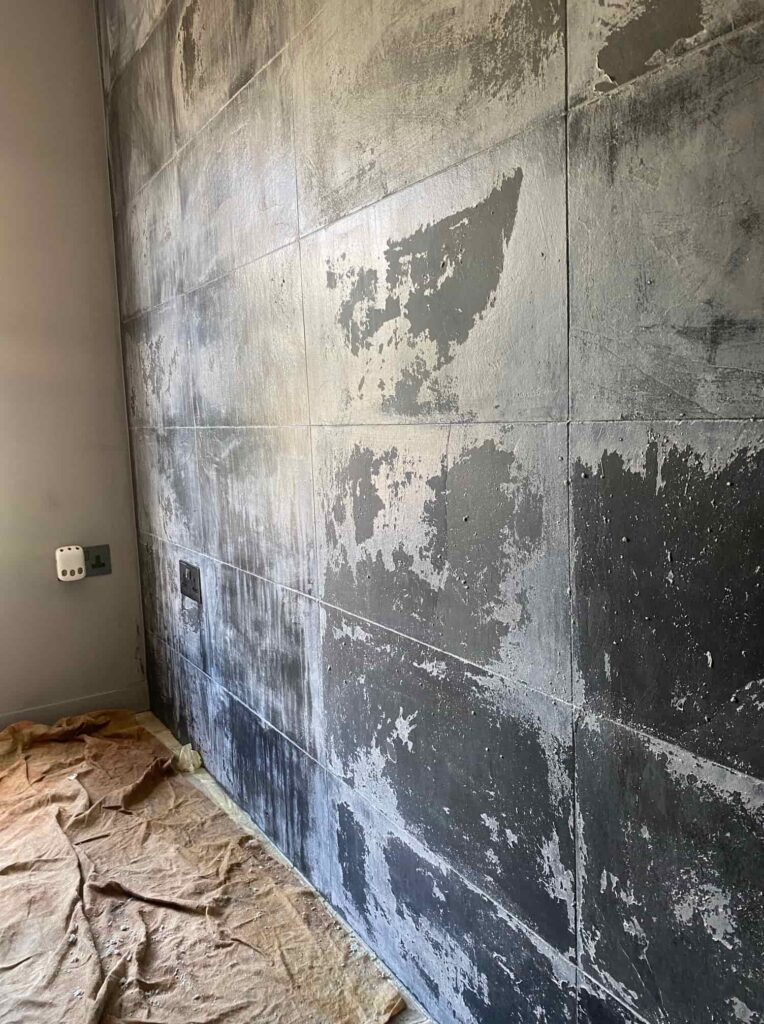
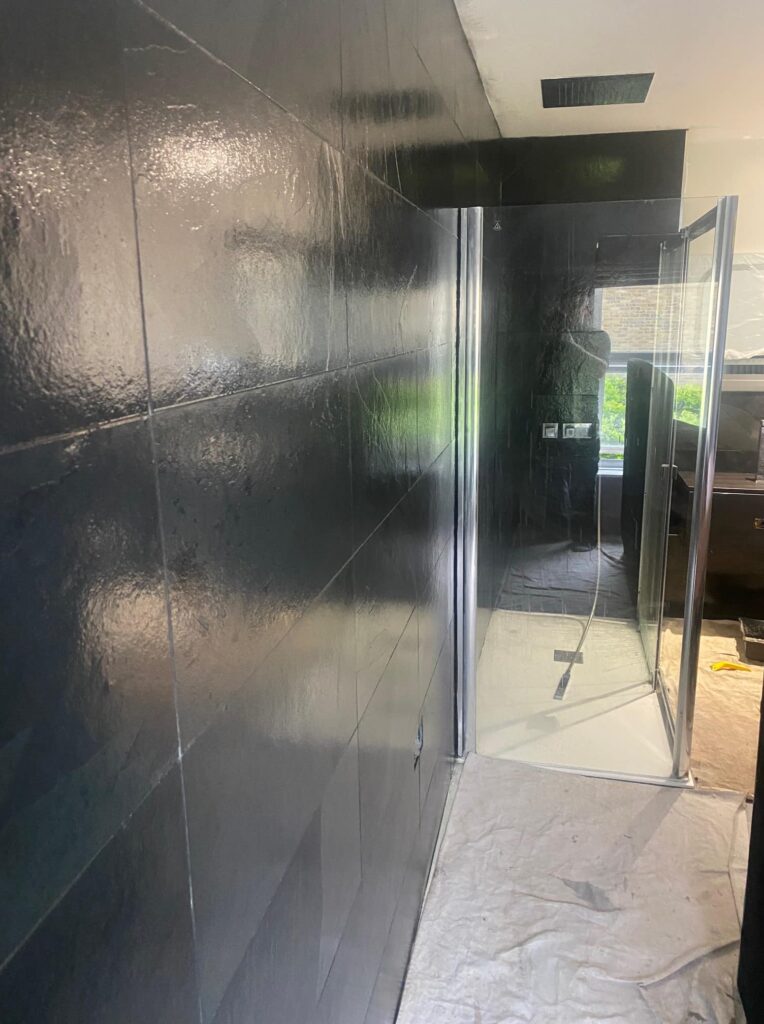
The photographs below are of a Slate Tiled Bathroom at a property in Penge. The customer had an open plan ensuite bathroom and feature wall in Black Slate, unfortunately however the topical sealer had become damaged and now looked terrible. The owner was clearly unhappy with its appearance and called us in to take a look.

Slate Bathroom Tiles Before Cleaning Penge

I went over to the property to survey the tiles and work out what had happened. In this case I diagnosed that moisture had penetrated beneath the sealer causing it to become white and cloudy. Clearly the sealer used previously was not the best choice for a bathroom where a high level of moisture in the air is common.

Slate Bathroom Tiles Before Cleaning Penge

The solution would be to remove the old sealer entirely, clean the tile and grout and then apply a suitable impregnating sealer which wouldn’t have the same issue. I worked out a quote along these lines which was accepted and a date set for my return to carry out the work.

Slate Bathroom Tiles Before Cleaning Penge

Removing Sealer from Black Slate Wall Tiles

I set about removing the old sealer by applying a strong dilution of Tile Doctor Remove and Go which as its name suggests is a coatings remover. Working in one section at a time the solution was decanted into a spray bottle and sprayed onto the wall tile, this mixes the solution with air making it lighter and helps it stick to vertical surfaces better.

After a few minutes the solution was worked into the stone by hand with a scouring pad, the delay gives the product time to start breaking down the old sealer. After scrubbing a section, it was rinsed with water and checked to see if more work was needed. Due to the thickness of the sealer I had to repeat this process several times aided by a steam cleaner before I was happy all the sealer had been removed.

Slate Bathroom Tiles During Cleaning Penge

When I was happy that all the damaged sealer had been removed from the Slate tiles, I continued to remove all the sealer from the remaining area. This is important as I would be applying an impregnating sealer later and any remaining sealer would prevent it from soaking into the tile. Also, the last thing you want is different depths of sealer on the stone as it will result in an inconsistent appearance.

Sealing Slate Wet Room Tiles

When all the sealer had been removed and the Slate was dry, I was then able to re-apply the new sealer. Its important that the stone was dry before applying the new sealer as any dampness in the stone can effect the way the sealer cures.

I chose two products to seal the Black Slate starting with a single coat of Tile Doctor Colour Grow which was selected for several reasons. First, its fully breathable so can cope with moisture, also as its name suggests it contains a colour enhancing formula which helps to bring out the best in dark stone. This product is also an impregnator which basically means it will soak into the stone, occupying the pores and thereby ensuring that any contaminants remain on the surface where they can be easily wiped away.

Once all the Black Slate was covered, I allowed a quick dwell time before rubbing off the excess sealer. After the first coat of Colour Grow had dried I the applied a second coat of Tile Doctor Stone Oil, this really enhances the colour of the stone. The same application and drying process were used, before I carried out a third and final coast of sealer using Colour Grow again.

Slate Bathroom Tiles After Renovation Penge

The combination of sealers brought out the best in the Black Slate which developed a lovely deep shine. The result was completely transformative and as you can imagine the owner was very happy with the improvement.

For aftercare I recommended they clean the shower tiles with Tile Doctor Aqua Pro, this is a gentle but effective spray on shower tile cleaner that has been created for cleaning sealed stone. The formula won’t harm the sealer ensuring it lasts longer.

Slate Bathroom Tiles After Renovation Penge


Professional Slate Tile Restoration in a Kent Wet Room

Damaged Sealer Replaced on Black Slate Wall Tiles in a Penge Bathroom Read More »
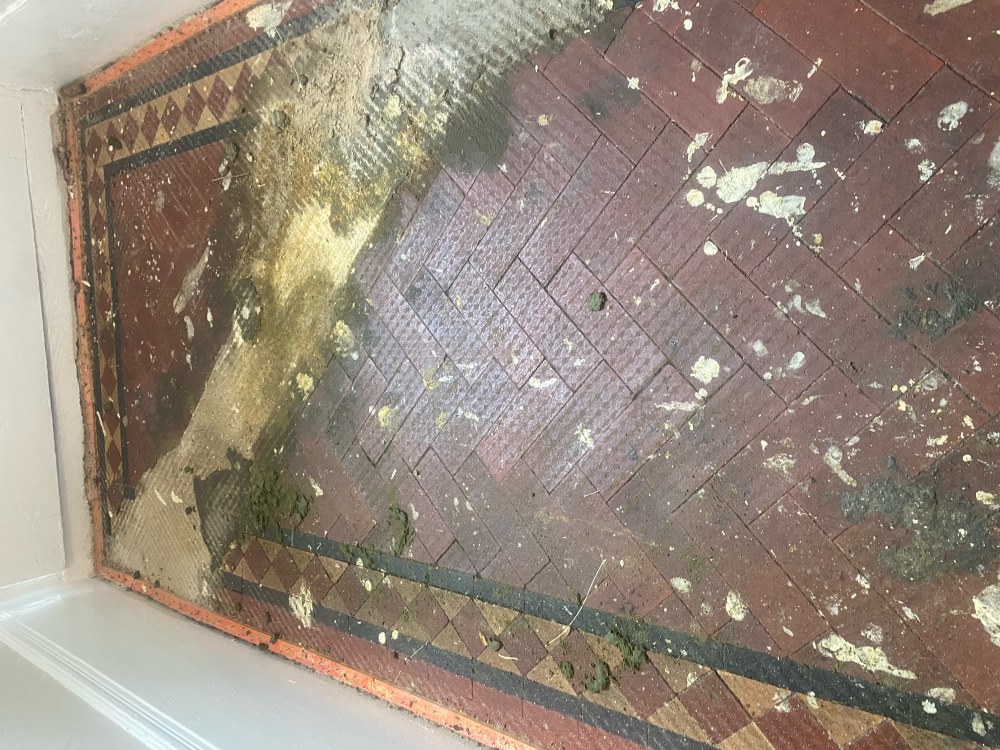
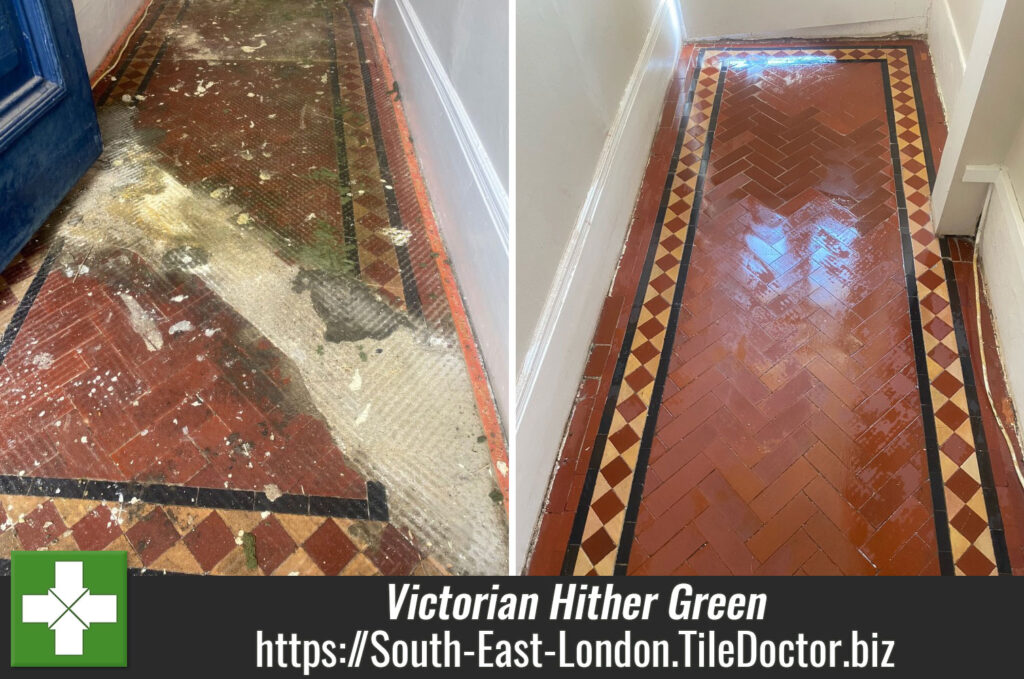
Victorian Hallway Floor Restoration Hither Green

Carpet Covered Victorian Tiled Hallway Restored in Hither Green

I was asked to view a Victorian tiled communal hallway floor at a property in Hither Green that serviced two Victorian maisonettes. The original Victorian tiles had been covered in carpet and an underlay for many years and now that had worn through the residents decided to investigate having the original tiles restored.

I went over to the property to inspect the floor and create a plan for its restoration. We pulled the carpet back and discovered that a section of tiles were missing and the gap had been backfilled with a sand cement mix. I didn’t know at this point whether the base was solid or if the tiles around the repair would also need to be lifted and replaced.

The Victorian tiles had also been imprinted with the pattern from the carpet underlay and the carpet had been secured to the floor with gripper and adhesive all of which would need to be removed as part of the restoration.

Victorian Hallway Floor Before Restoration Hither Green

Undaunted with the task at hand I created a quote for this restoration which included replacing the missing tiles with matching replacements then deep cleaning and sealing the tiles to protect them going forward.

Happy with the quote I was given the go-ahead to start the work and pre-order the replacement tiles.

Repairing a Carpet Covered Victorian Tiled Hallway

When I started the work, I found that the base was generally in good condition and solid so not many additional tiles would need to be replaced. I then set about replacing the main body of the tiling and the border where it was needed, using new reproduction geometric tiles. They were as close a match to the original however being newer they were a slightly different shade.

Once all the tiles had been replaced and repaired, I turned my attention to cleaning the floor to remove the staining and years of dirt. I started this with an application of Tile Doctor Remove & Go which is designed to remove sealers and other contaminants. The tiles did not have a visible sealer on them however it did have years of grease and oil that would need to be broken down.

A strong dilution of Remove and go was applied to the tiles and then allowed to dwell and soak in for around half an hour. It was then worked into the floor with a black scrubbing pad fitted to a rotary machine. The dirty solution was then extracted using a wet vacuum.

Next the floor was treated to an acid rinse with an application of Tile Doctor Acid Gel. The acid gel sits on top of the clay-based tiles and doesn’t soak in giving me a longer working time on the tile surface. This was then worked in with soft diamond burnishing pads of 50, 100 and 200-grit. These pads cut into the surface of the tile leaving it very clean but are not strong enough to scratch or change the tile surface. It does however remove the pattern on the tile left by the underlay. The acid will also counter any efflorescent salt issues that may be dormant in the tile which is a common problem with old floors that don’t have the advantage of a damp proof membrane.

Once the acid had been vacuumed up, I rinsed the tiles thoroughly with a steam cleaner, this lifts all the cleaning chemicals out of the tile and dries quickly.

Sealing a Victorian Tiled Hallway

When the floor was totally dry, I set about sealing the tiles which will protect them going forward and ensure that dirt remains on the surface where it easily cleaned away. I use Tile Doctor Colour Grow to seal original Victorian floor tiles, this is an impregnating sealer, that enhances the natural colour of the tiles and leaves the floor with a natural matt finish. Its also fully breathable so will allow moisture to rise through the tile and not become trapped underneath where it could reach out to the walls and cause rising damp.

I applied three coats of Colour Grow, but after the first coat, I noticed that there was a different shade of Red between the new reproduction tiles and the original tiles. As the original tiles were lighter, I applied a coat of Tile Dr “Stone Oil”, to the original tiles only, to help darken them, before applying the third and final coat of Colour Grow.

Victorian Hallway Floor During Restoration Hither Green

The restoration completely transformed the floor and the customers were very happy with the result. For aftercare I recommend they use Tile Doctor Neutral Tile Cleaner, which is safe to use on sealed tiles. Many of the products you find in supermarkets are simply too strong and can remove the sealer so its always best to read the label.


Professional Victorian Tiled Hallway Restoration and Extension in Hither Green

Carpet Covered Victorian Tiled Hallway Restored in Hither Green Read More »

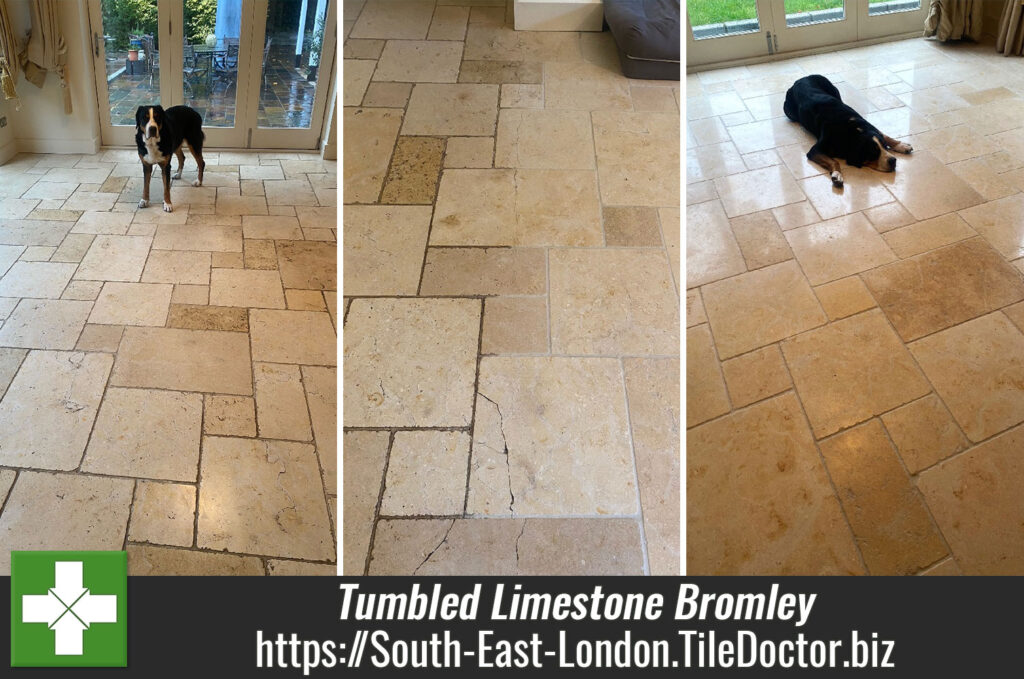
Limestone Floor Cleaning and Polishing Bromley

Tumbled Limestone Floor Cleaned, Polished and Sealed in Bromley

I get called to renovate this Tumbled Limestone tiled floor at a property in Bromley every few years. The sealer does a good job of protecting the stone, but it does wear off with use and the natural crevices in the Travertine attract dirt easily. The other problem of course is the grout which due to its cementous nature also attracts dirt and darkens over time.

Limestone Floor Before Cleaning Bromley

Polished stone floors do regular attention if you want to keep them looking good and this is why we offer a maintenance program where we pop back to the property once a year to top up the sealer and repolish. In this case the owner also had a dog who was very well natured however dogs are not know for wiping their feet before entering your house.

Limestone Floor Before Cleaning Bromley

Stripping and Polishing Tumbled Limestone Tiles

With most polished Limestone floors, I would normally start with a set of burnishing pads which are the best way to restore the finish. In this case however I decided to start the cleaning process with the application of a strong dilution of Tile Doctor Pro-Clean which is left to soak into the stone for ten minutes before being worked in. This gives the product time to digest and breakdown the dirt that gets trapped in the crevices. I then use a silicon carbide brush fitted to a rotary floor machine to work the solution into the stone to bring out the dirt. The soiling is then rinsed off the floor and extracted with a wet vacuum.

The next step was to burnish the stone using a set of Diamond encrusted pads of increasing grits that range from a coarse 400-grit to a very fine 3000-grit. The pads are fitted to the rotary machine and are run across the whole floor lubricating with water which is deployed from a tank on the machine. After each the pad the soiling is rinsed away and extracted with the wet vacuum as before.

Limestone Floor During Cleaning Bromley

I stopped the burnishing process on the first day with the 1500-grit pad and turned my attention to the grout joints which are scrubbed by hand with a wire brush and more Pro-Clean. After another rinse and extract the Limestone and grout was already looking noticeably cleaner.

Sealing Limestone Tiles

I returned the next day and set about polishing the floor with the last in the set of burnishing pads which is a 3000-grit pad. This pad is applied with only a little water sprayed on to the stone as its run over the surface, this technique is known as a spray burnish and leaves the floor dry and ready to be sealed.

I was already aware that the owners of the property like the stone to look completely natural and so the sealer chosen was Tile Doctor Ultra-Seal. This is an impregnating sealer that works by soaking into the pores of the stone so dirt cannot become ingrained there allowing it to be easily removed from the surface. It doesn’t change the appearance of the stone at all so it’s almost invisible and difficult to detect which is exactly what they were after. Ultra-Seal is also a great grout sealer and will ensure the grout keeps clean for much longer.

Limestone Floor After Cleaning Polishing Bromley

Once the sealer was dry gave the floor an application of Tile Doctor Shine Powder which is a stone polishing compound that is worked into stone, left to dry and then buffed off with a White buffing pad to leave a durable shine on the stone.

Limestone Floor After Cleaning Polishing Bromley

Before leaving I took time to discuss aftercare cleaning and left them with a complimentary bottle of Tile Doctor Stone Soap which not only cleans but also help maintain the patina on polished stone.


Professional Renovation of a Large Polished Limestone Floor in Kent

Tumbled Limestone Floor Cleaned, Polished and Sealed in Bromley Read More »
Chinese Slate Kitchen Floor Renovation Keston

Renovating Chinese Slate Kitchen Flooring in Keston BR2

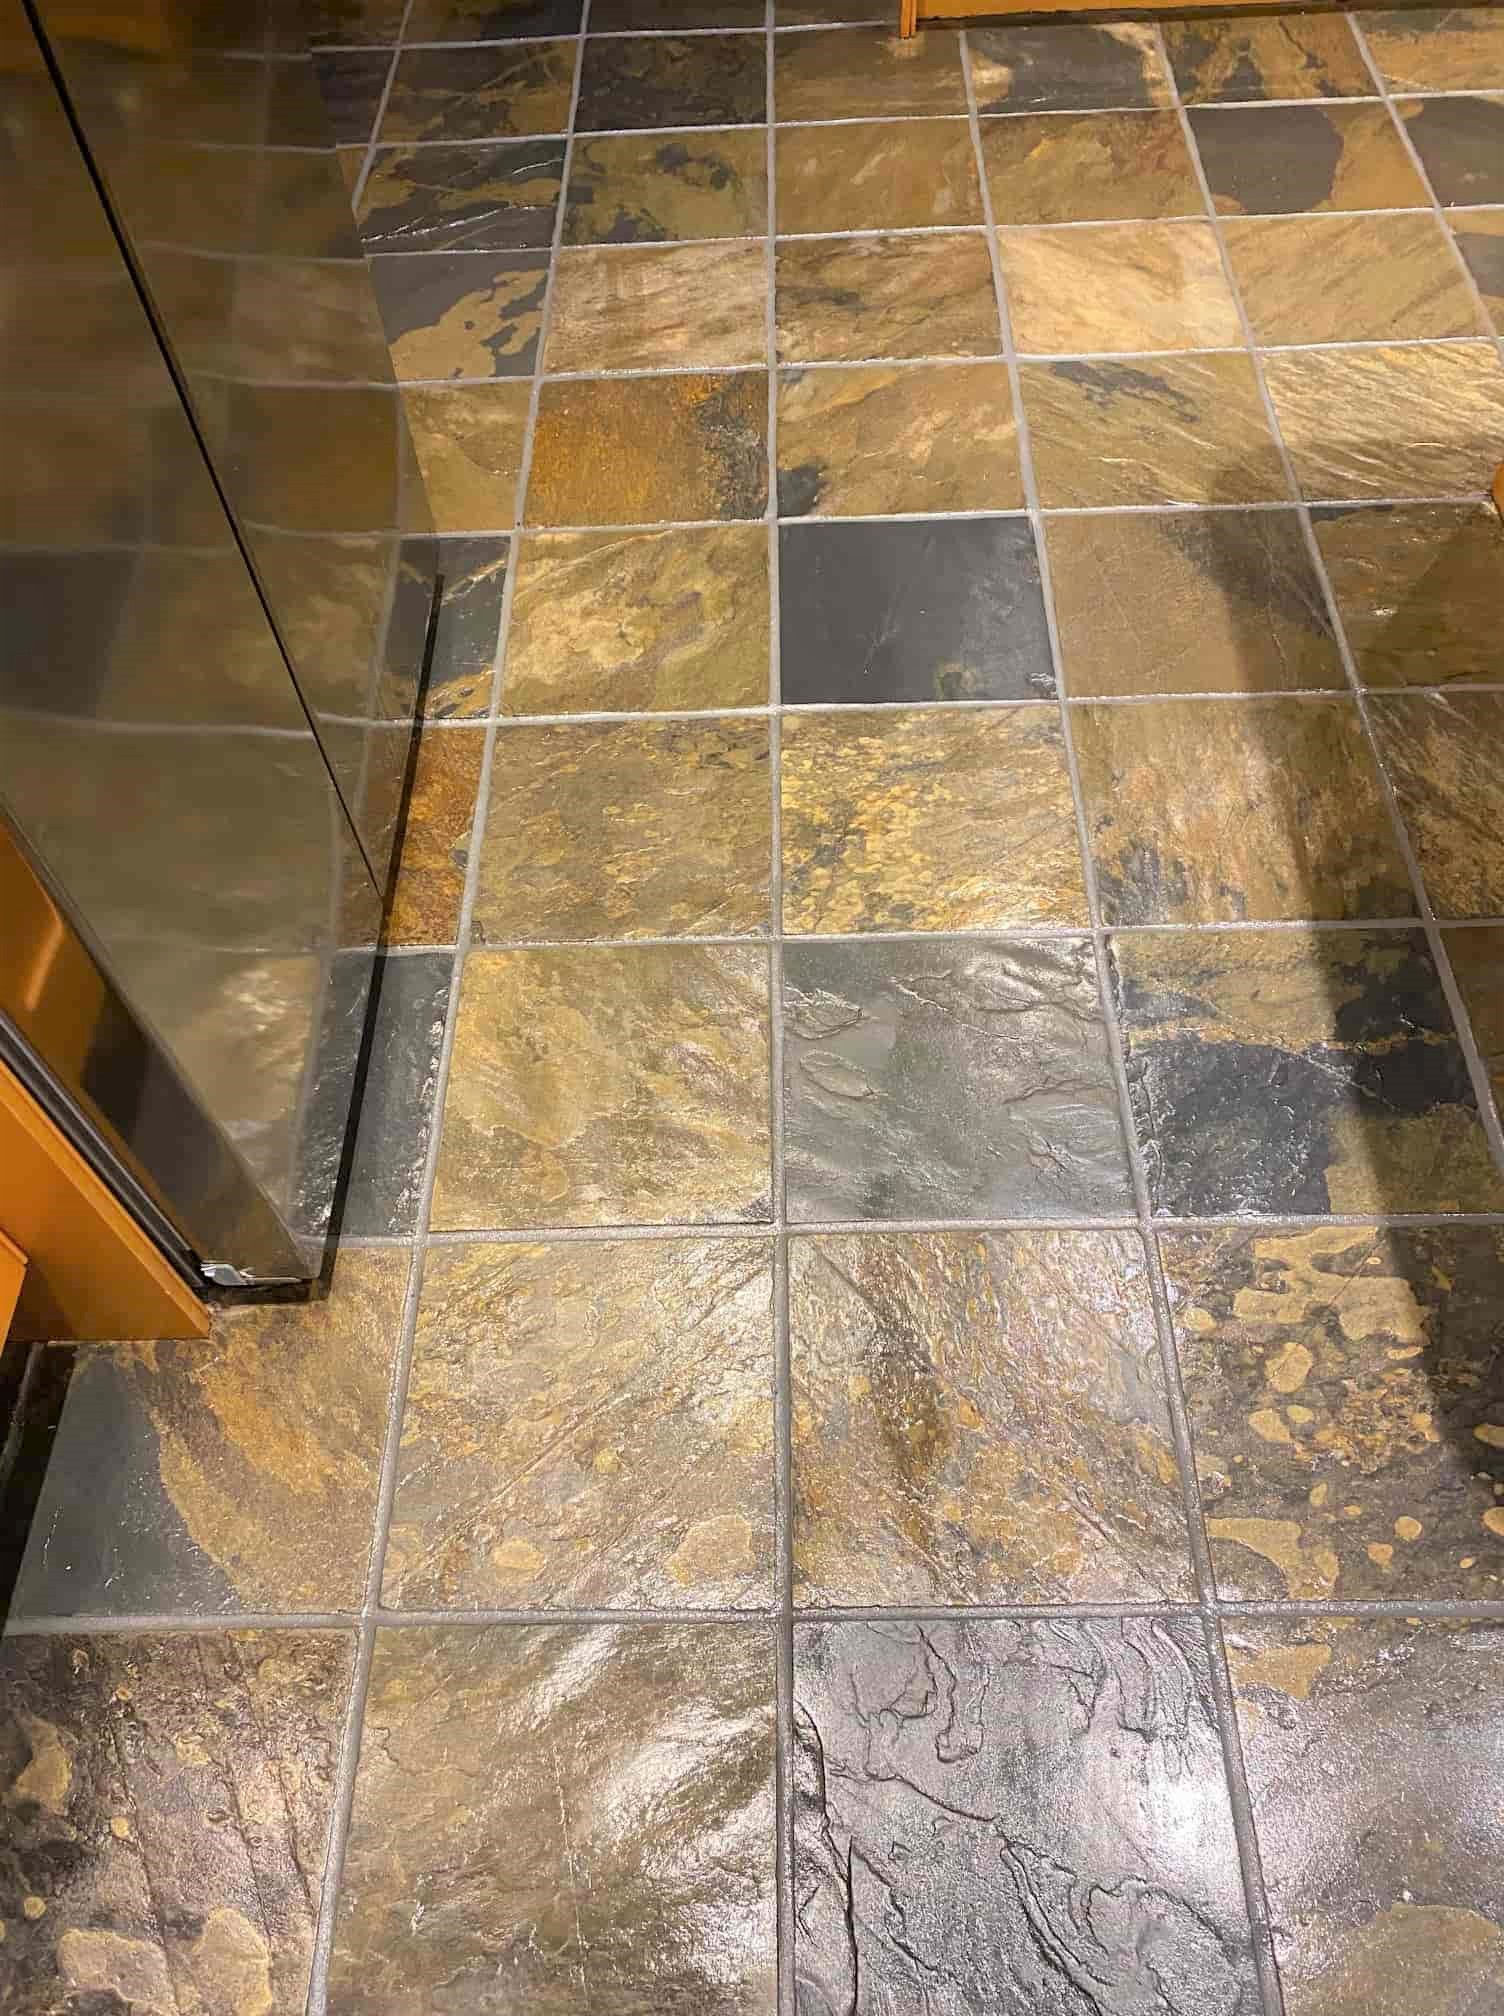
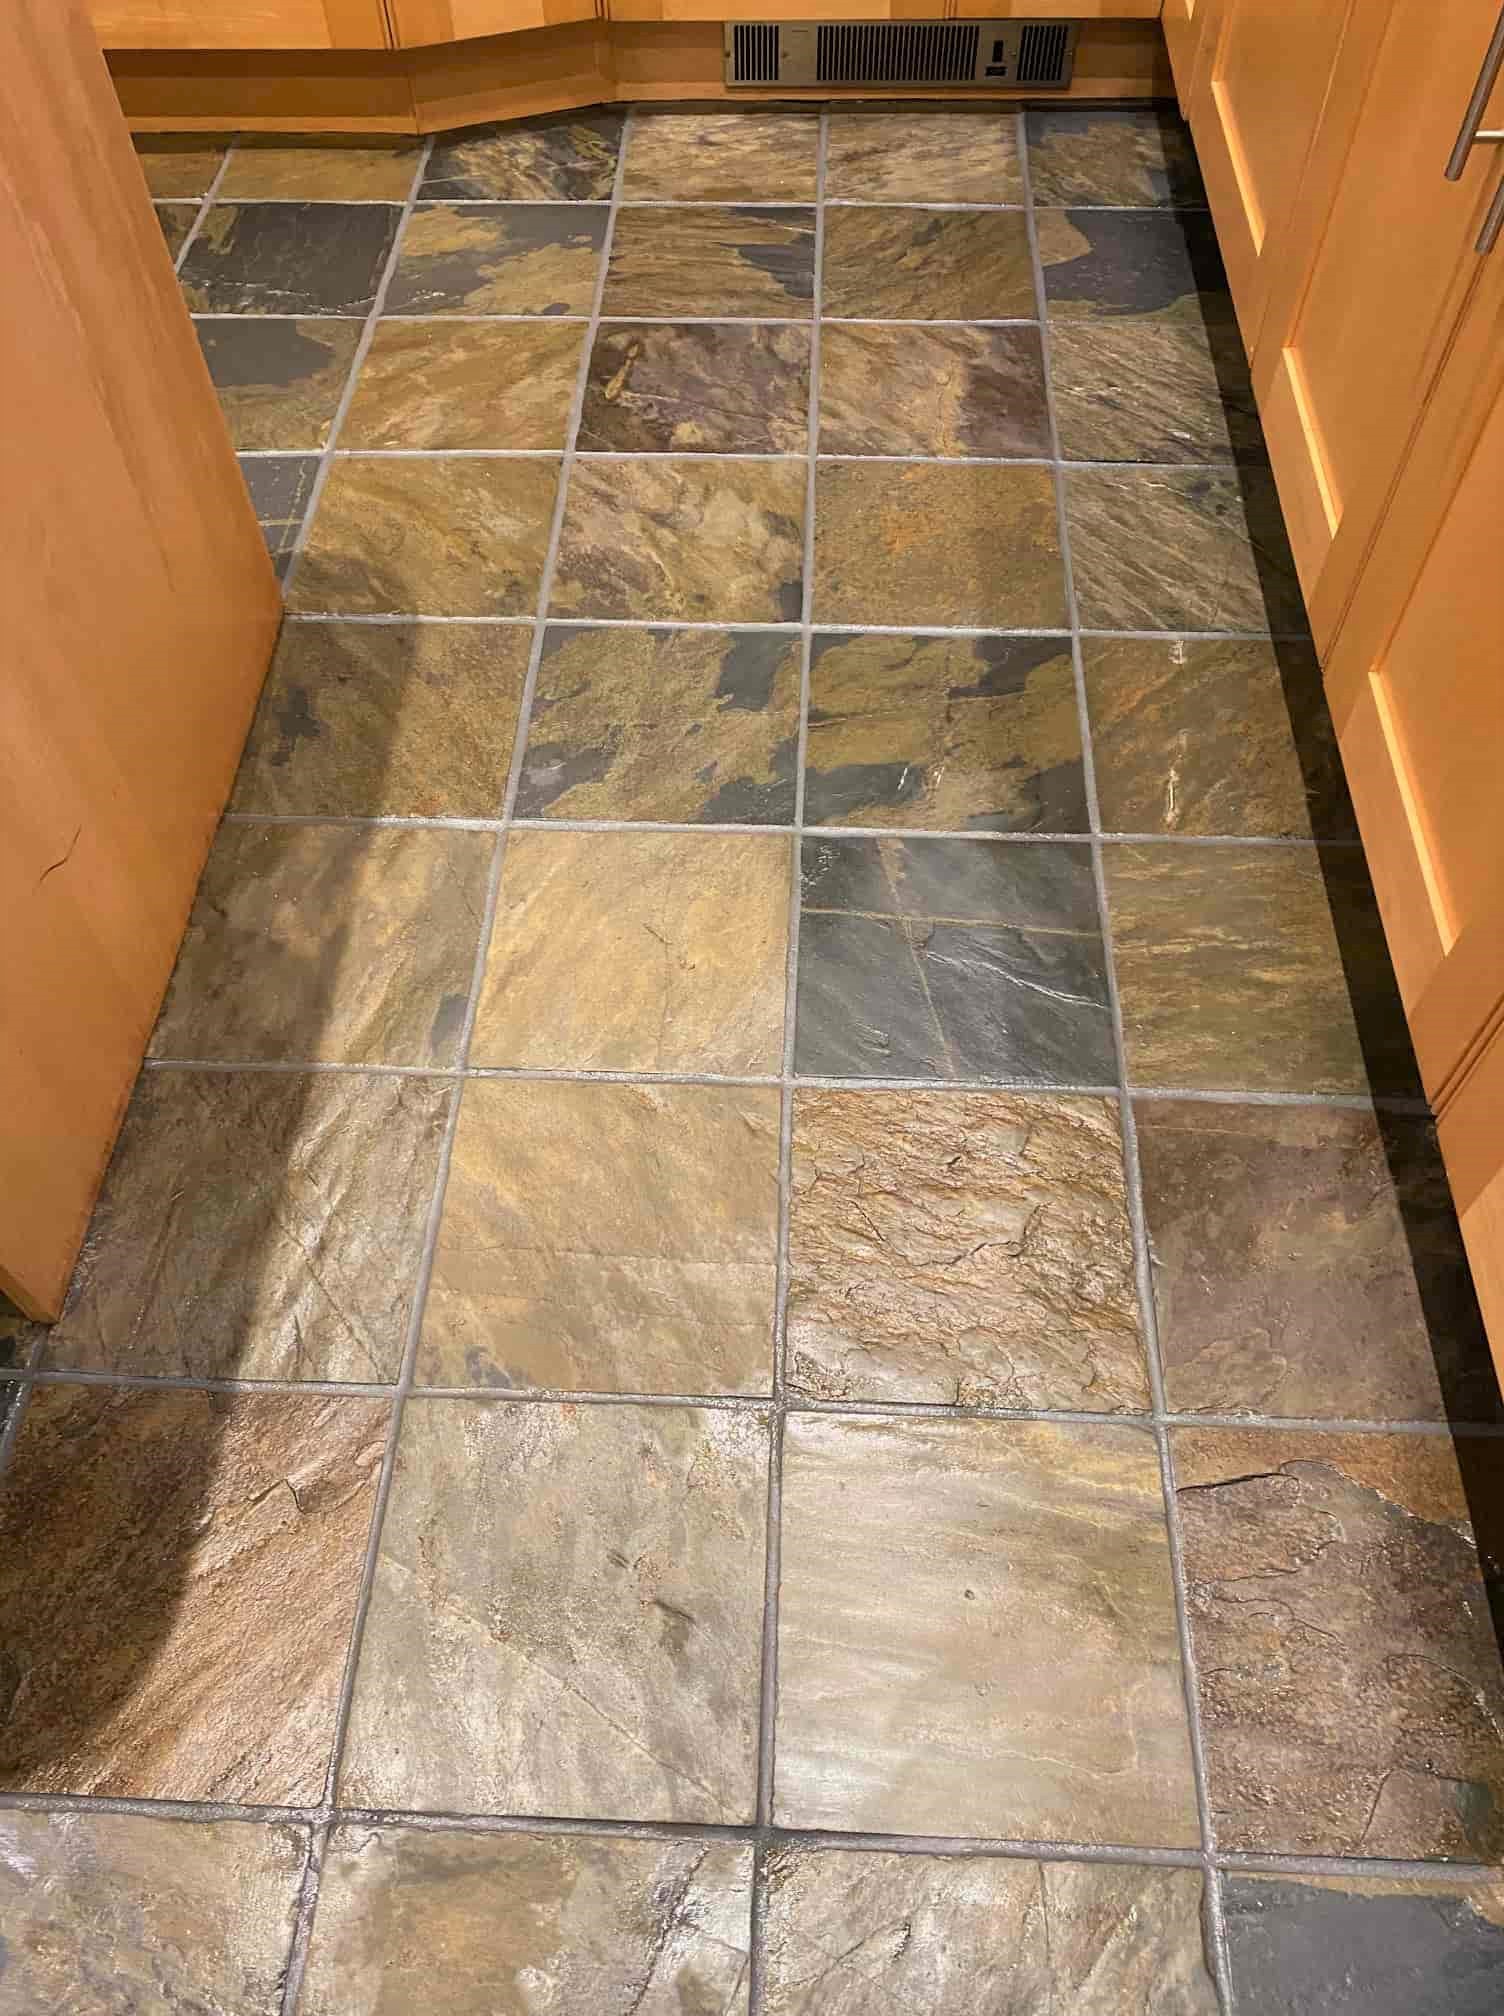
A client in Keston asked me to freshen up the Chinese Slate floor tiles that had been installed in the Kitchen. Kitchens are the busiest room in the house and overtime the floor had become tired and dull with ingrained dirt, the grout was also stained with dark patches. He had tried cleaning with lots of household products but nothing was improving the appearance.

Dull Chinese Slate Kitchen Floor Before Cleaning Keston

I visited the property to survey the floor and recommend a solution to the problem. I could see the floor had previously been sealed but it had degraded in several areas and in some places, there was no sealer present at all. Consequently, dirt was able to get into the pores of the stone where it is difficult to remove. All these problems detracted from what should be a very beautiful Slate floor.

Dull Chinese Slate Kitchen Floor Before Cleaning Keston

To demonstrate my point, I picked a small area of tiling and conducted a test clean followed by the application of a fresh sealer; the floor came up well and my client could see that we could improve the floor significantly. Impressed with the different he was happy to go ahead with my quote and we returned the following month to carry out the work.

Deep Cleaning a Chinese Slate Tiled Kitchen Floor

There was an old topical sealer on the Slate which had to be removed first. To do this I like to use a combination of Tile Doctor Remove and Go combined with and Tile Doctor Nanotech HBU. I applied the solution to the tiles and grout and allowed it to soak in and get to work for around thirty minutes. The two products combined create a powerful solution that will remove the old sealer and start to break down the stains in the tile and grout.

After thirty minutes, I added water to the solution and scrubbed, paying particular attention to the grout lines, then I vacuumed up the solution using the wet vacuum we have on board. I then went over the tiles and grout with my steamer to ensure I had rinsed and removed all chemicals.

When dry I could see the grout staining was far too deep to be able to get perfectly clean so I applied a grey Tile Doctor Grout Colourant to the grout lines. As well as refreshing the grout to give a consistent and uniform colour it also seals the grout, protecting it with an epoxy barrier making it much easier to clean and maintain going forward. When the grout colourant was dry it was now time to apply the sealer to the slate.

Sealing a Chinese Slate Tiled Kitchen Floor

I advised the client to switch from a topical sealer to an impregnating sealer that works by soaking into the stone, occupying the pores, and thereby preventing dirt from residing there.

Happy with my recommendation I sealed the slate with Tile Doctor Colour Grow which as its name suggests contains a colour enhancing formular that it perfect highlighting the natural colours in Chinese slate.

Dull Chinese Slate Kitchen Floor After Renovation Keston

The sealer adds a new level of depth to the Slate and being an impregnator is hardwearing and long lasting. The new sealer will make the floor much easier to clean in future and on that topic I also recommended the use of Tile Doctor Neutral Tile Cleaner for that purpose.

Dull Chinese Slate Kitchen Floor After Renovation Keston

Neutral Tile cleaner is a pH neutral product that is effective yet mild enough not to impact the integrity of the freshly applied sealer. Many household cleaning products are simply too strong for use on a sealed floor (always check the label) and will break down the sealer which may be the reason for the previous sealer failing in the past.


Professional Renovation of a Chinese Slate Tiled Kitchen in Southeast London

Renovating Chinese Slate Kitchen Flooring in Keston BR2 Read More »

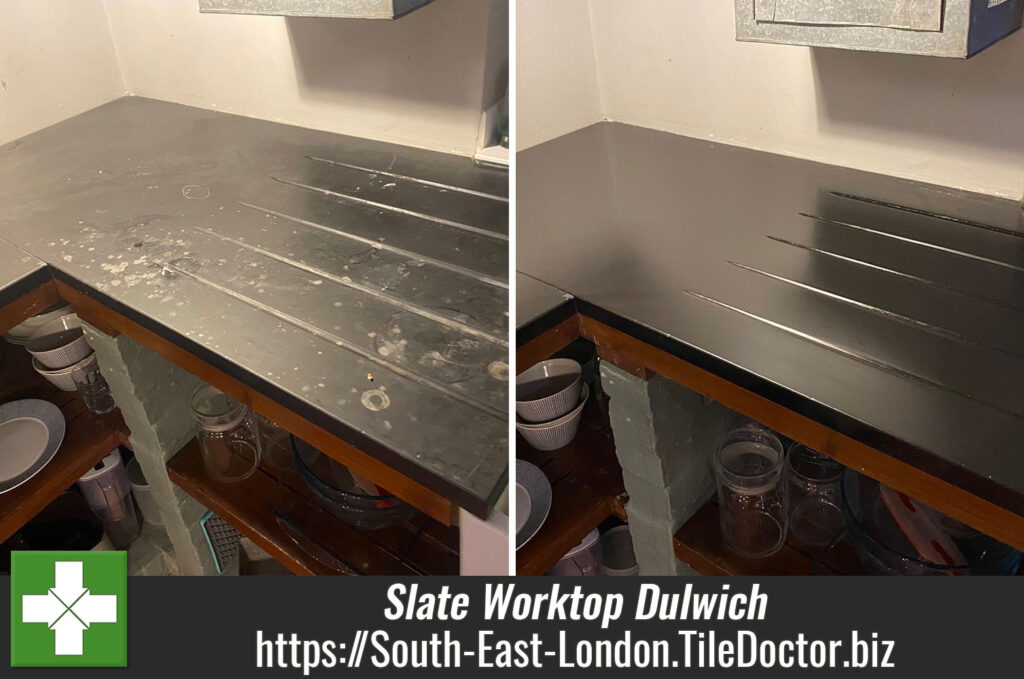
Black Slate Kitchen Worktop Renovated Dulwich South London

Removing Limescale from a Black Slate Worktop in a Dulwich Kitchen

I was contacted by a customer of mine from Dulwich who having been impressed with the work I did for them previously cleaning and sealing a stone floor wondered if I could obtain a similar result with the Black Slate worktop installed in their kitchen. I was due to visit the property anyway to perform a maintenance clean on the stone floor anyway so was able to look at it after that work was complete.

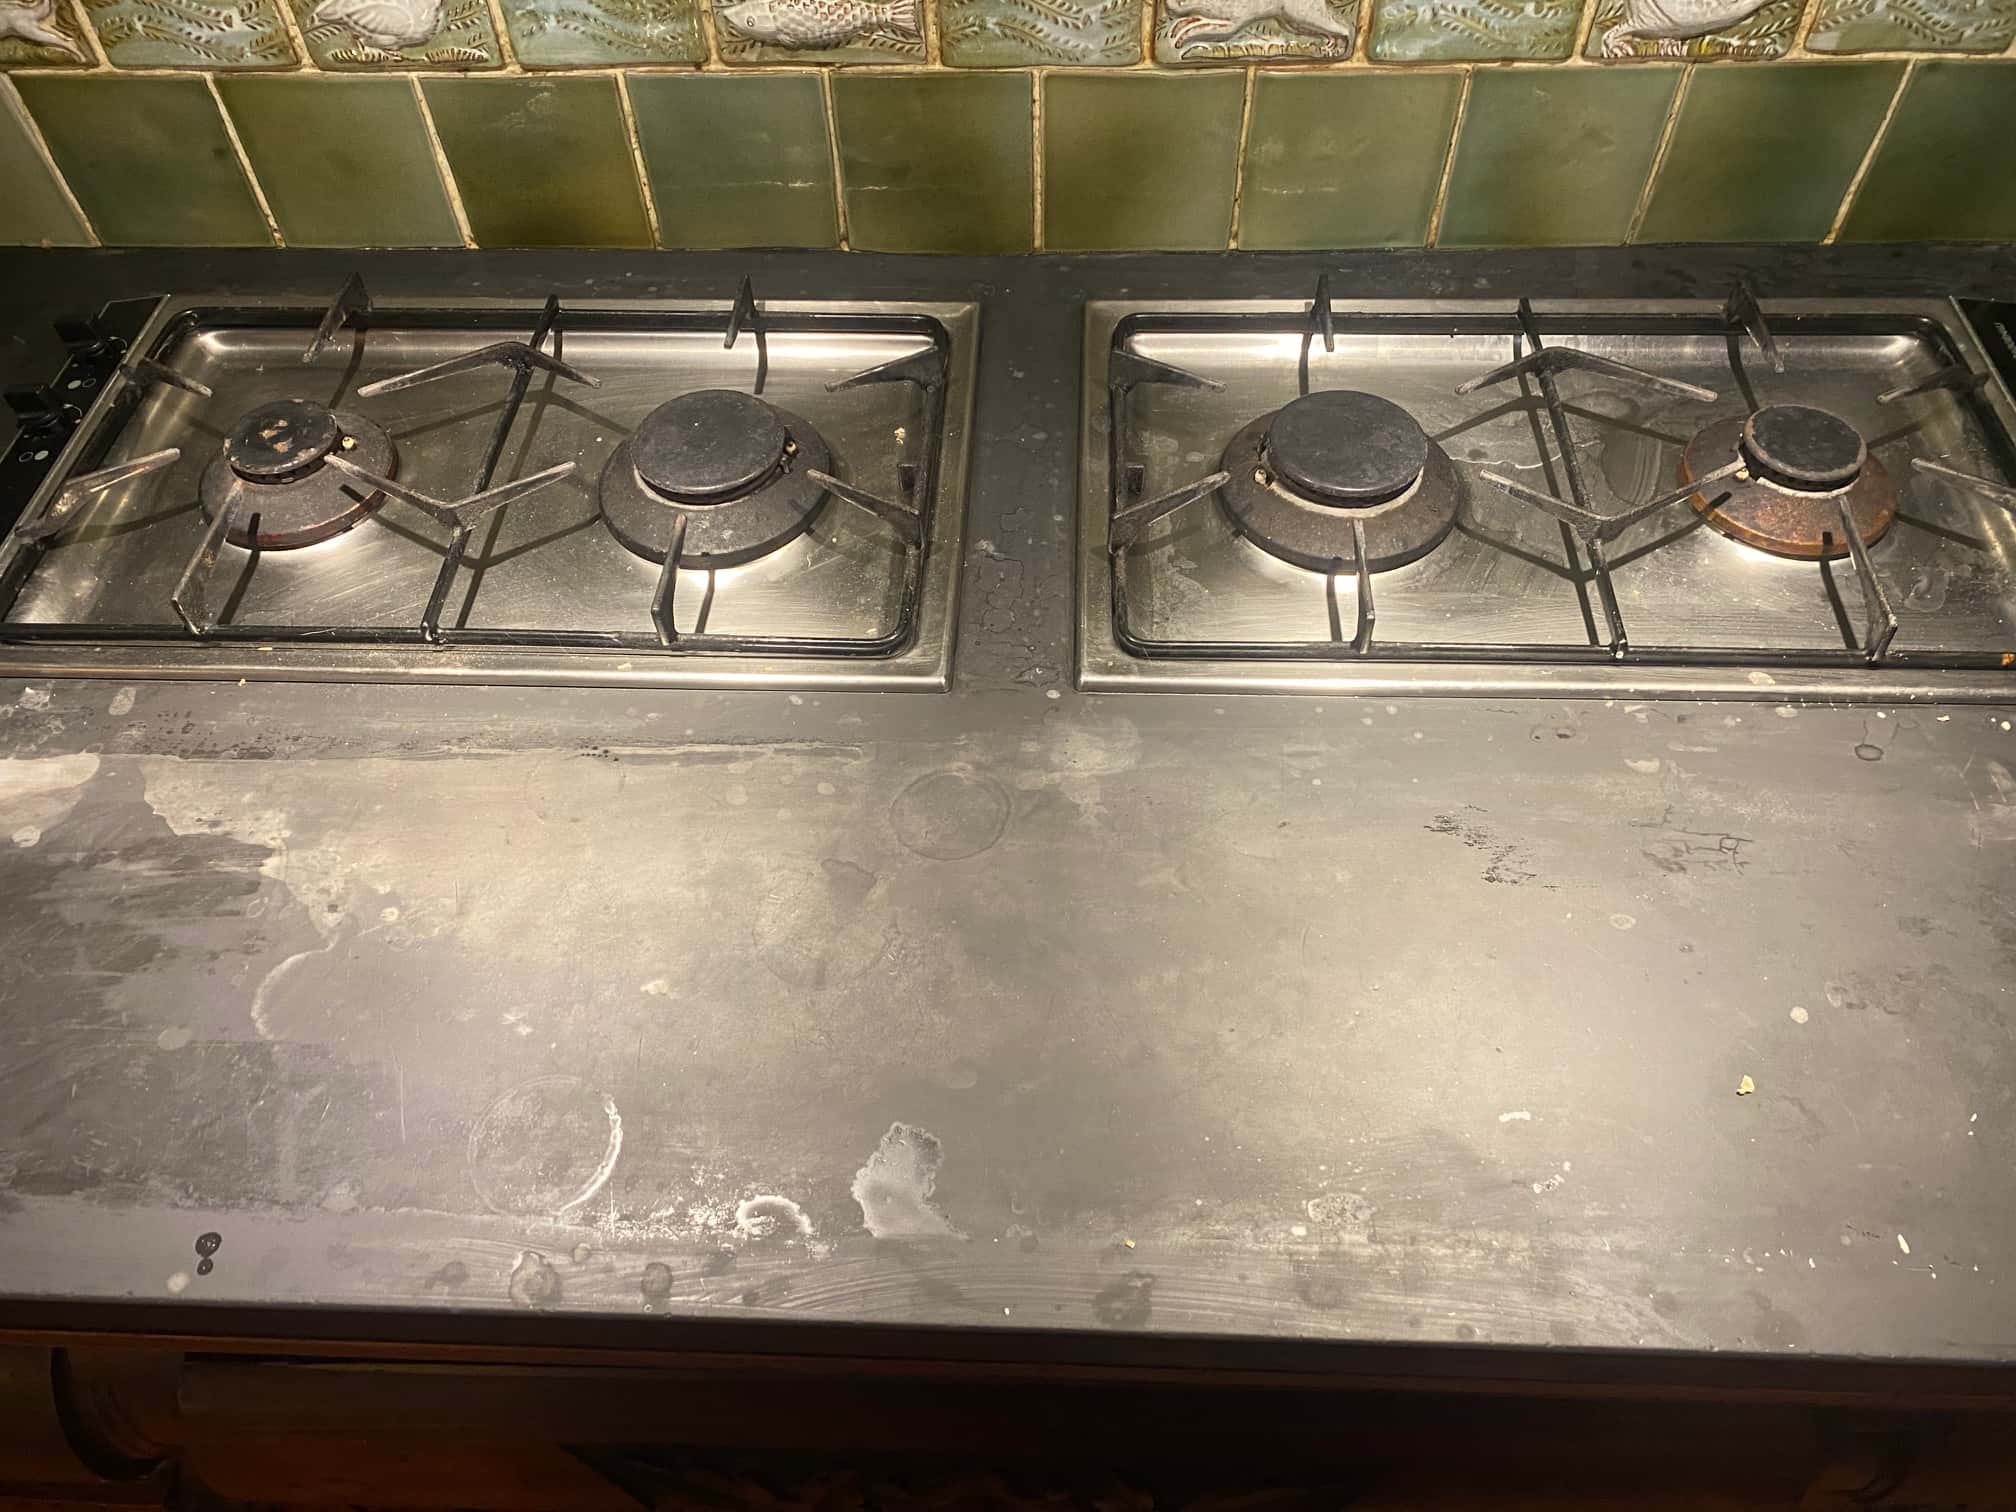
Black Slate Kitchen Worktop Before Renovation Dulwich

I don’t mention this very often but I recommend to owners of polished stone floors that they ask me to return on an annual basis to re-polish the floor and top-up the sealer, we call this a maintenance visit and it ensures the tiles look its best for much longer. The process takes a couple of hours as opposed to a full clean and seal which typically takes two days.

After maintaining the floor I turned my attention to the Black Slate worktop and could see not only had it lost its deep shine it was spotted with ring marks and stained with other contaminates from cooking. I detected that a topical sealer had been used on the Slate in the past but it was now patchy and to ensure the best result this needed to be completely removed, the stone polished and a fresh sealer applied.

Black Slate Kitchen Worktop Before Renovation Dulwich Black Slate Kitchen Worktop Before Renovation Dulwich

Renovating a Stained Black Slate Worktop

To strip off the old sealer I applied Tile Doctor Remove and Go and left it to soak into the Slate for around thirty minutes. Then using a small six-inch pad fitted to a hand-held buffer scrubbed the solution into the stone to remove all the old sealer and clean up the stone. The worktop was then rinsed down with water and a cloth.

With the old sealer removed I set about tackling the ring marks and White staining which were probably caused by water, (limescale) or acids from the use of strong cleaning products or food. I find the best way to tackle deep seated staining on stone is by burnishing the stone with a series of diamond encrusted burnishing pads in different grits. I started with a 200-grit pad with water, vacuuming up the solution as I went, and then went through the remaining set of diamond pads (400, 800, 1500 and 3000 grits) to ensure I had fully honed the stone and restored its polished appearance. With worktops I used the smaller six-inch pads fitted to the hand-held buffer mentioned earlier.

Sealing a Black Slate Kitchen Worktop

Once the worktop was dry I was able to apply a fresh sealer to improve the Black colour and protecting it going forward. For the best result I started off by applying an even coat of Tile Doctor Stone Oil, a sealer that soaks into the Slate enhancing colour and improving strength.

I allowed the Stone Oil to dry for about forty minutes and then followed up with Tile Doctor Colour Grow sealer, this also enhances the colour whilst providing durable surface protection. I buffed off the final coat with a dry cotton cloth within 15 minutes of it being applied

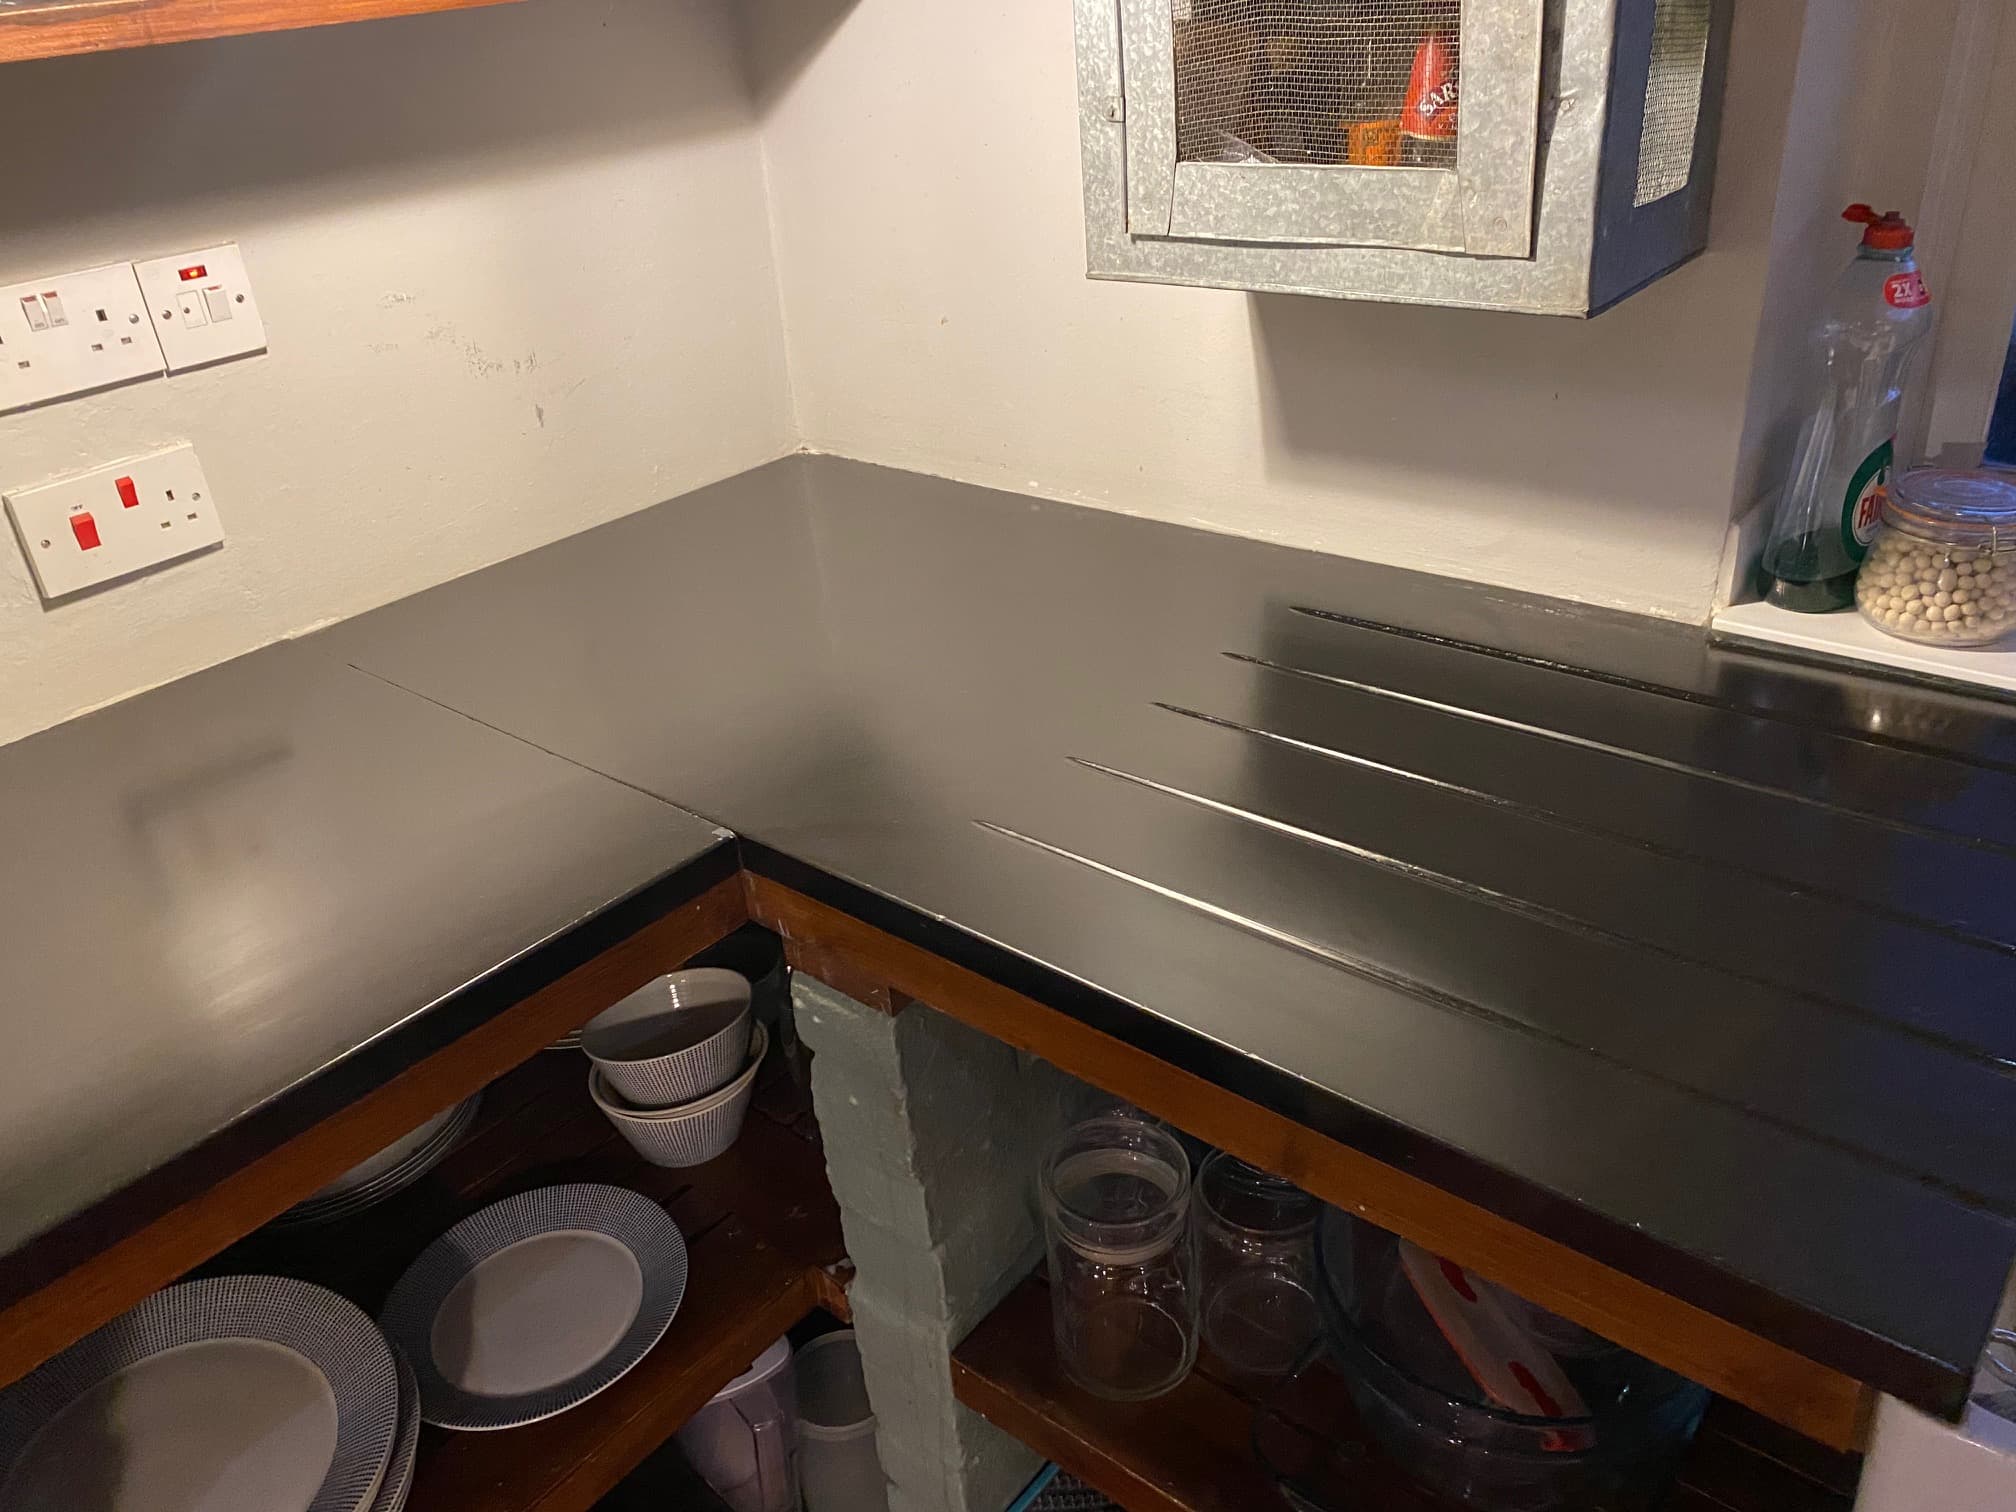
Black Slate Kitchen Worktop After Renovation Dulwich Black Slate Kitchen Worktop After Renovation Dulwich

Once done the Slate Worktop was completely transformed much to the delight of my customer who was relieved something could be done with it. For aftercare I recommend the use of Tile Doctor Stone Patina Spray which is a mild cleaner that will maintain the patina of the stone.

Black Slate Kitchen Worktop After Renovation Dulwich


Professional Renovation of a Stained Slate Worktop in South London

Removing Limescale from a Black Slate Worktop in a Dulwich Kitchen Read More »

Slate Bathroom Tile Renovation Bermondsey

Green Slate Bathroom Tile Refurbished in Bermondsey SE16

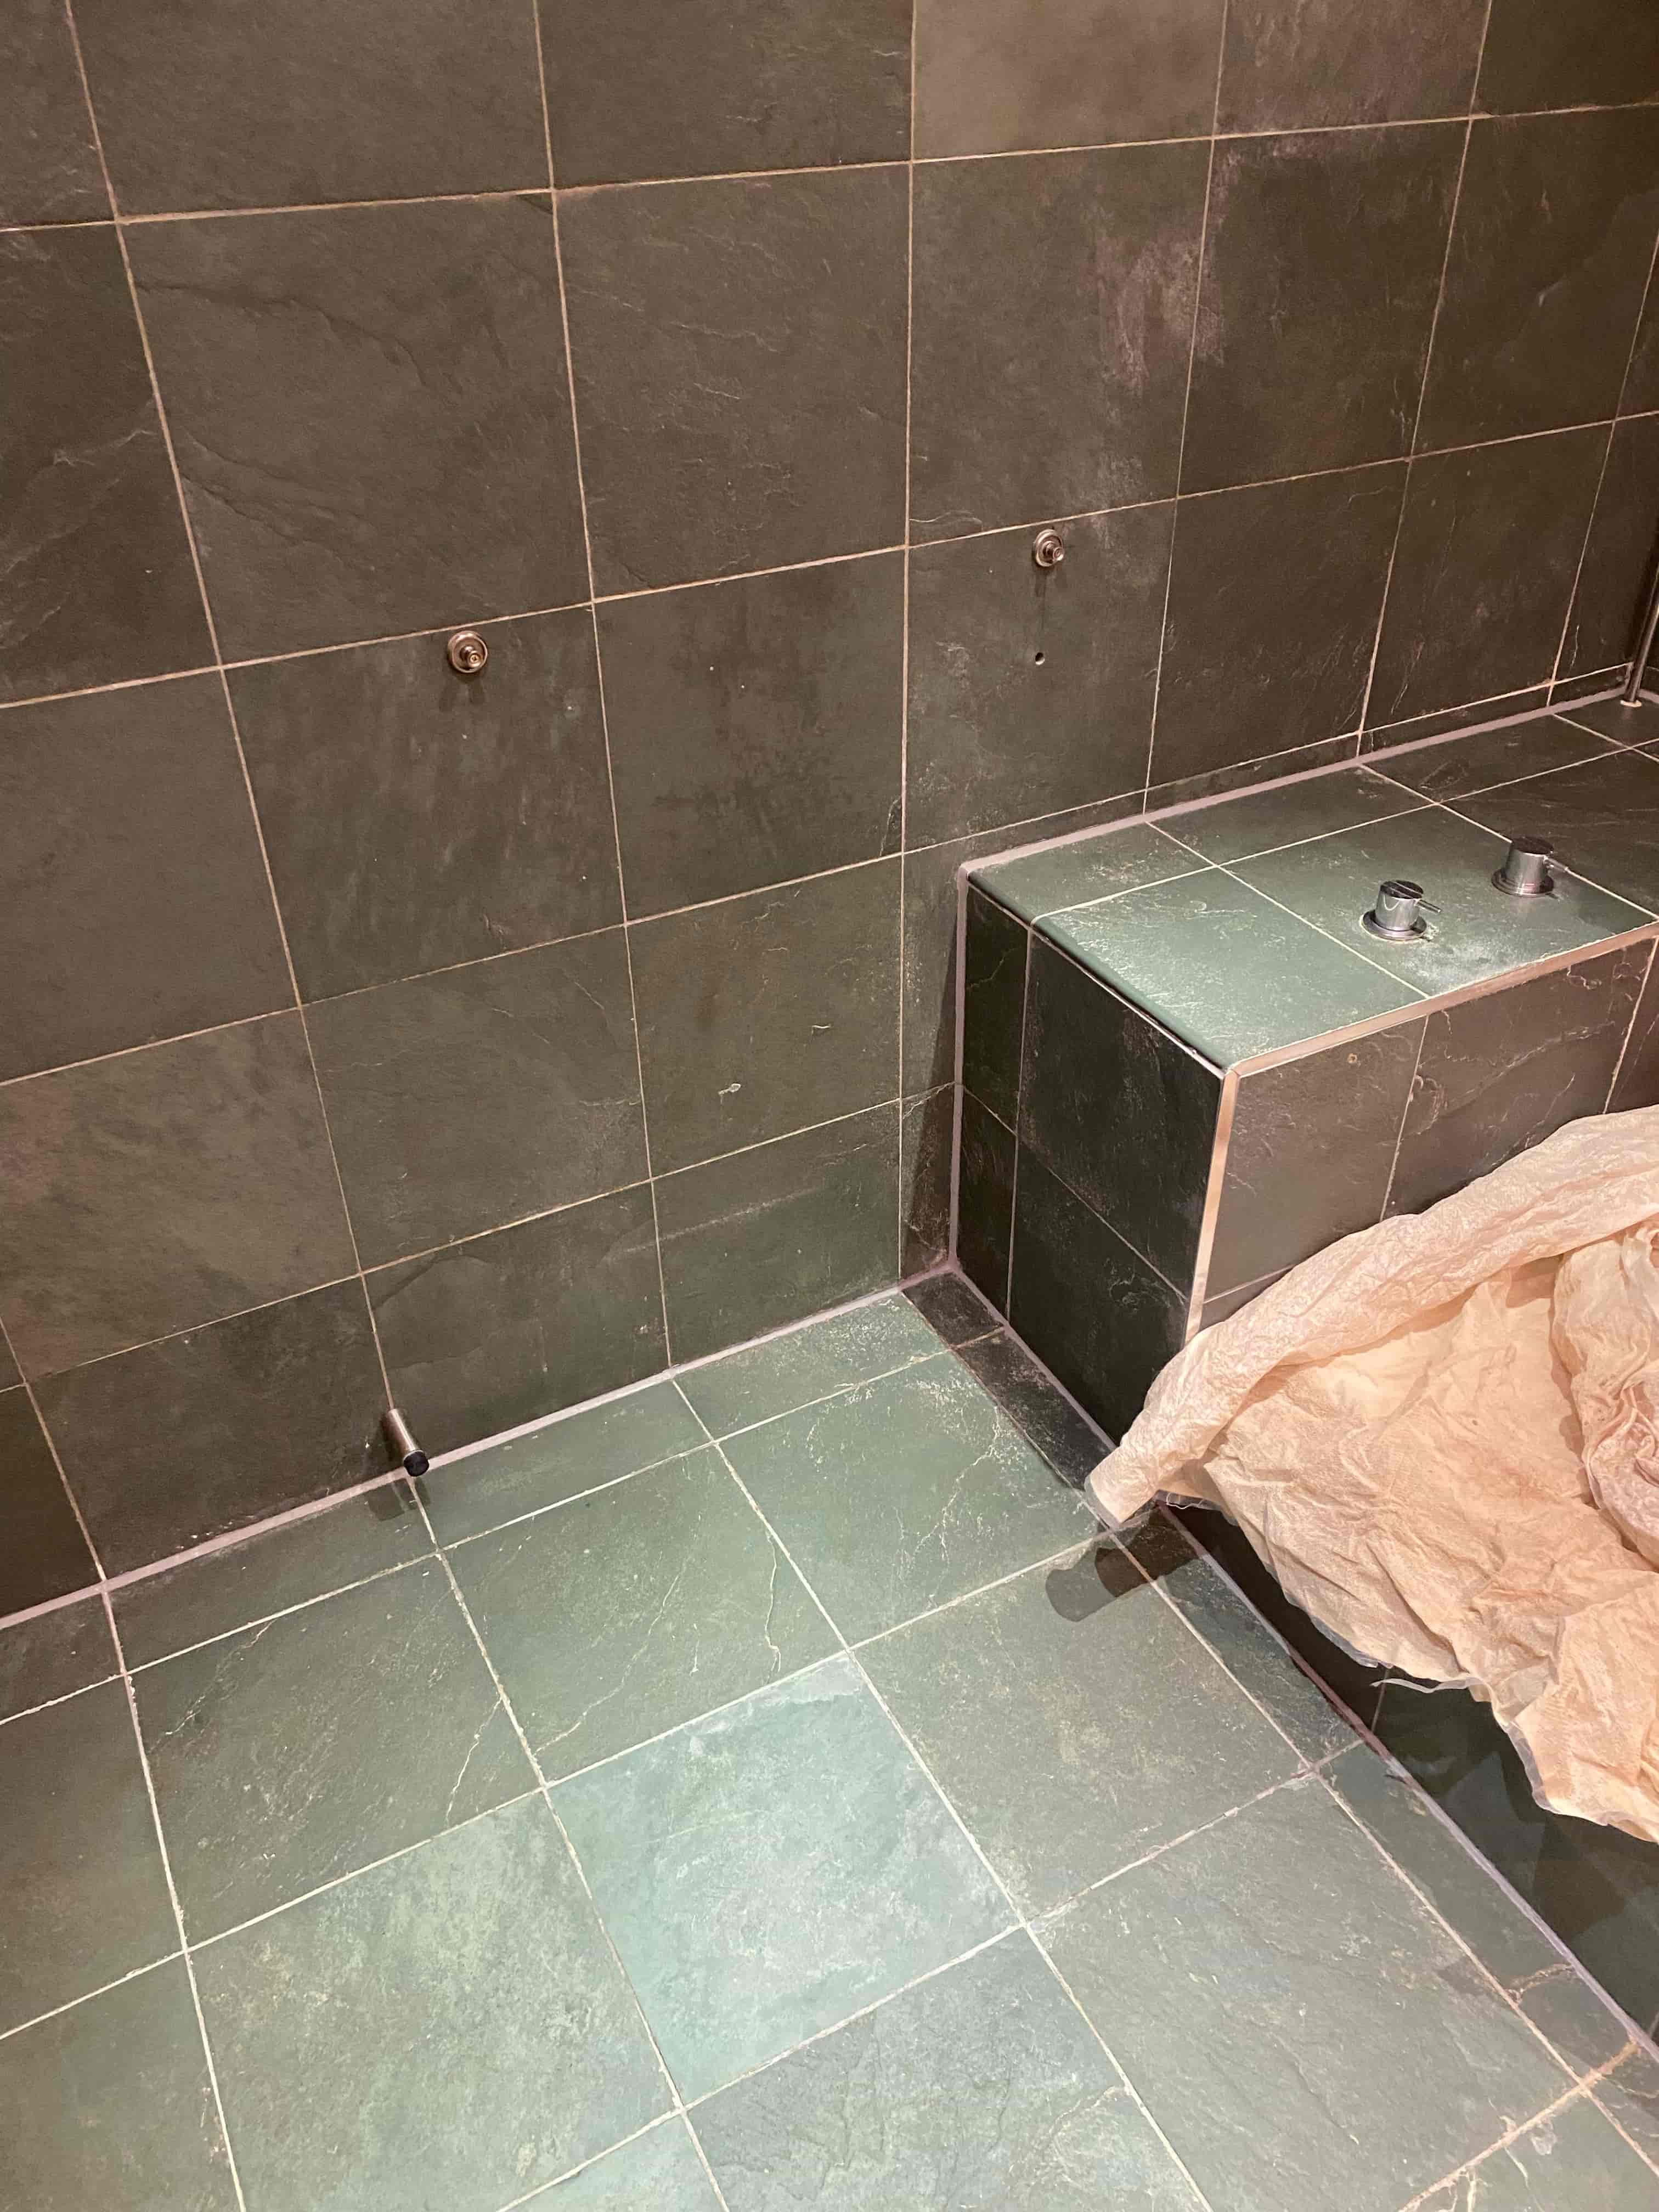
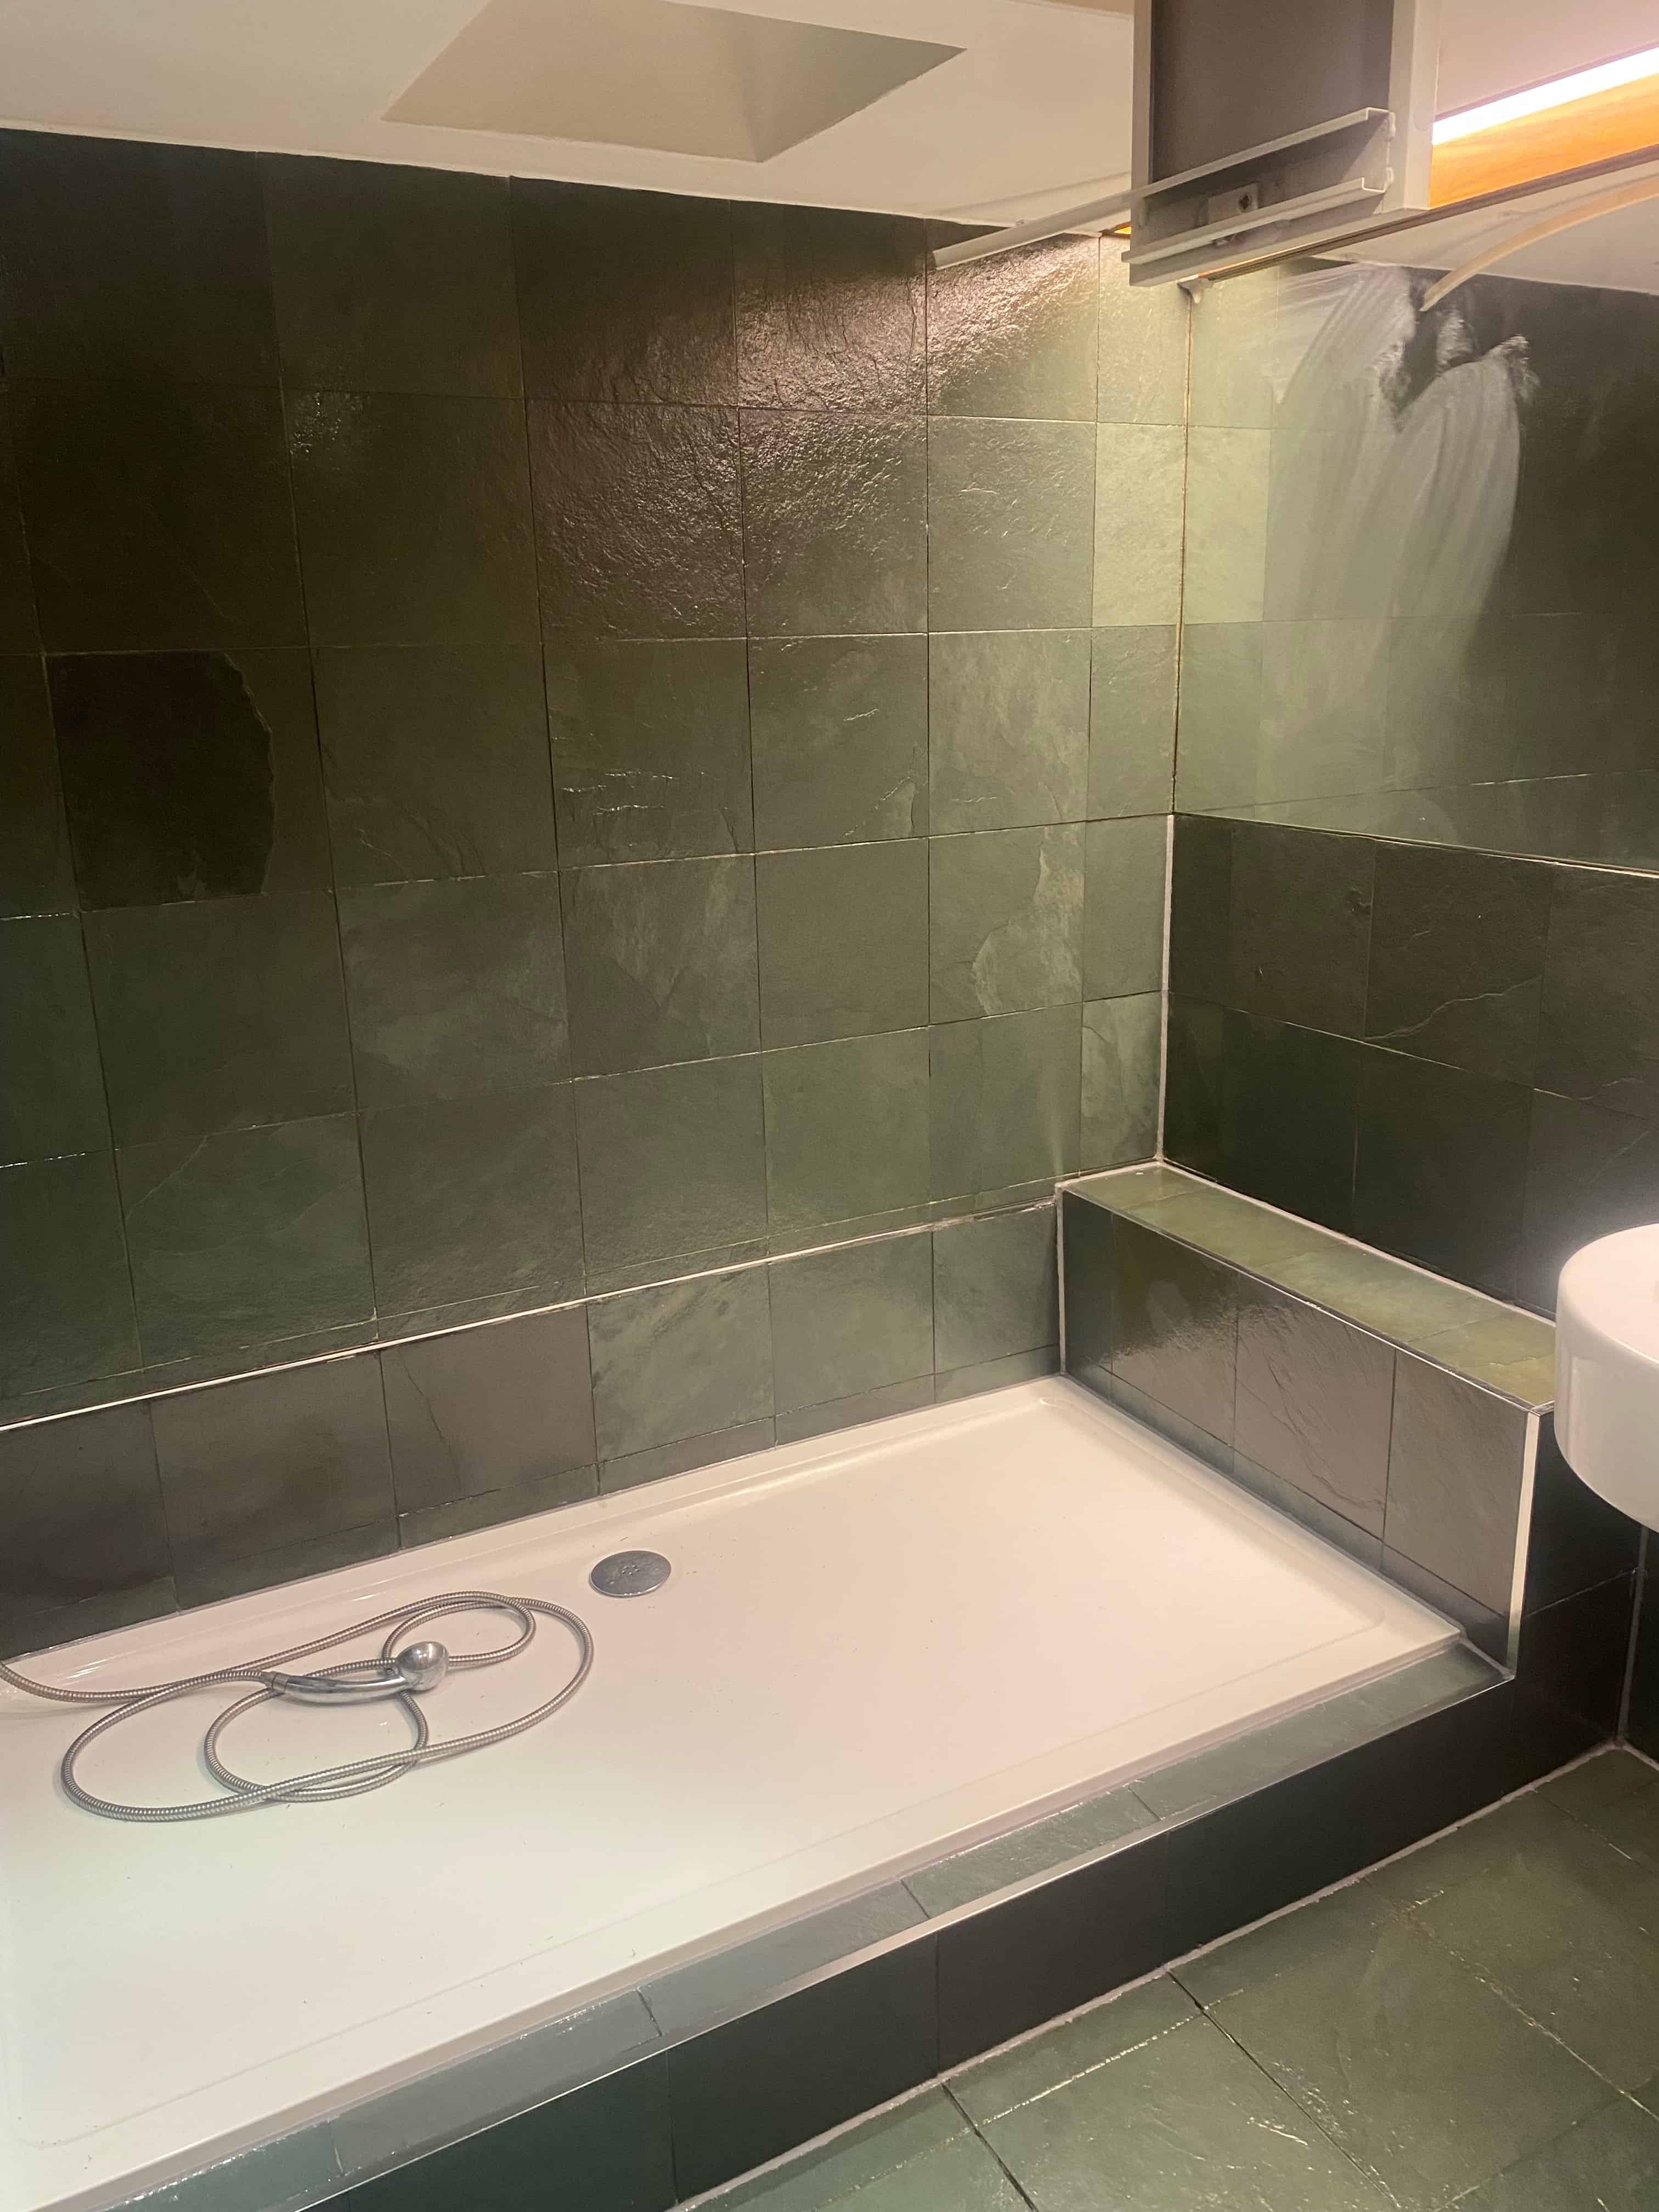
This customer from Bermondsey SE16, was having a new shower tray fitted after discovering a leak. He wanted to know if his Green Slate tiles could be spruced up rather than having to pay out for new tiles and the tiling. The property was a basement flat in a warehouse conversion and with only one bathroom in the property a full bathroom rip out would have been very inconvenient.

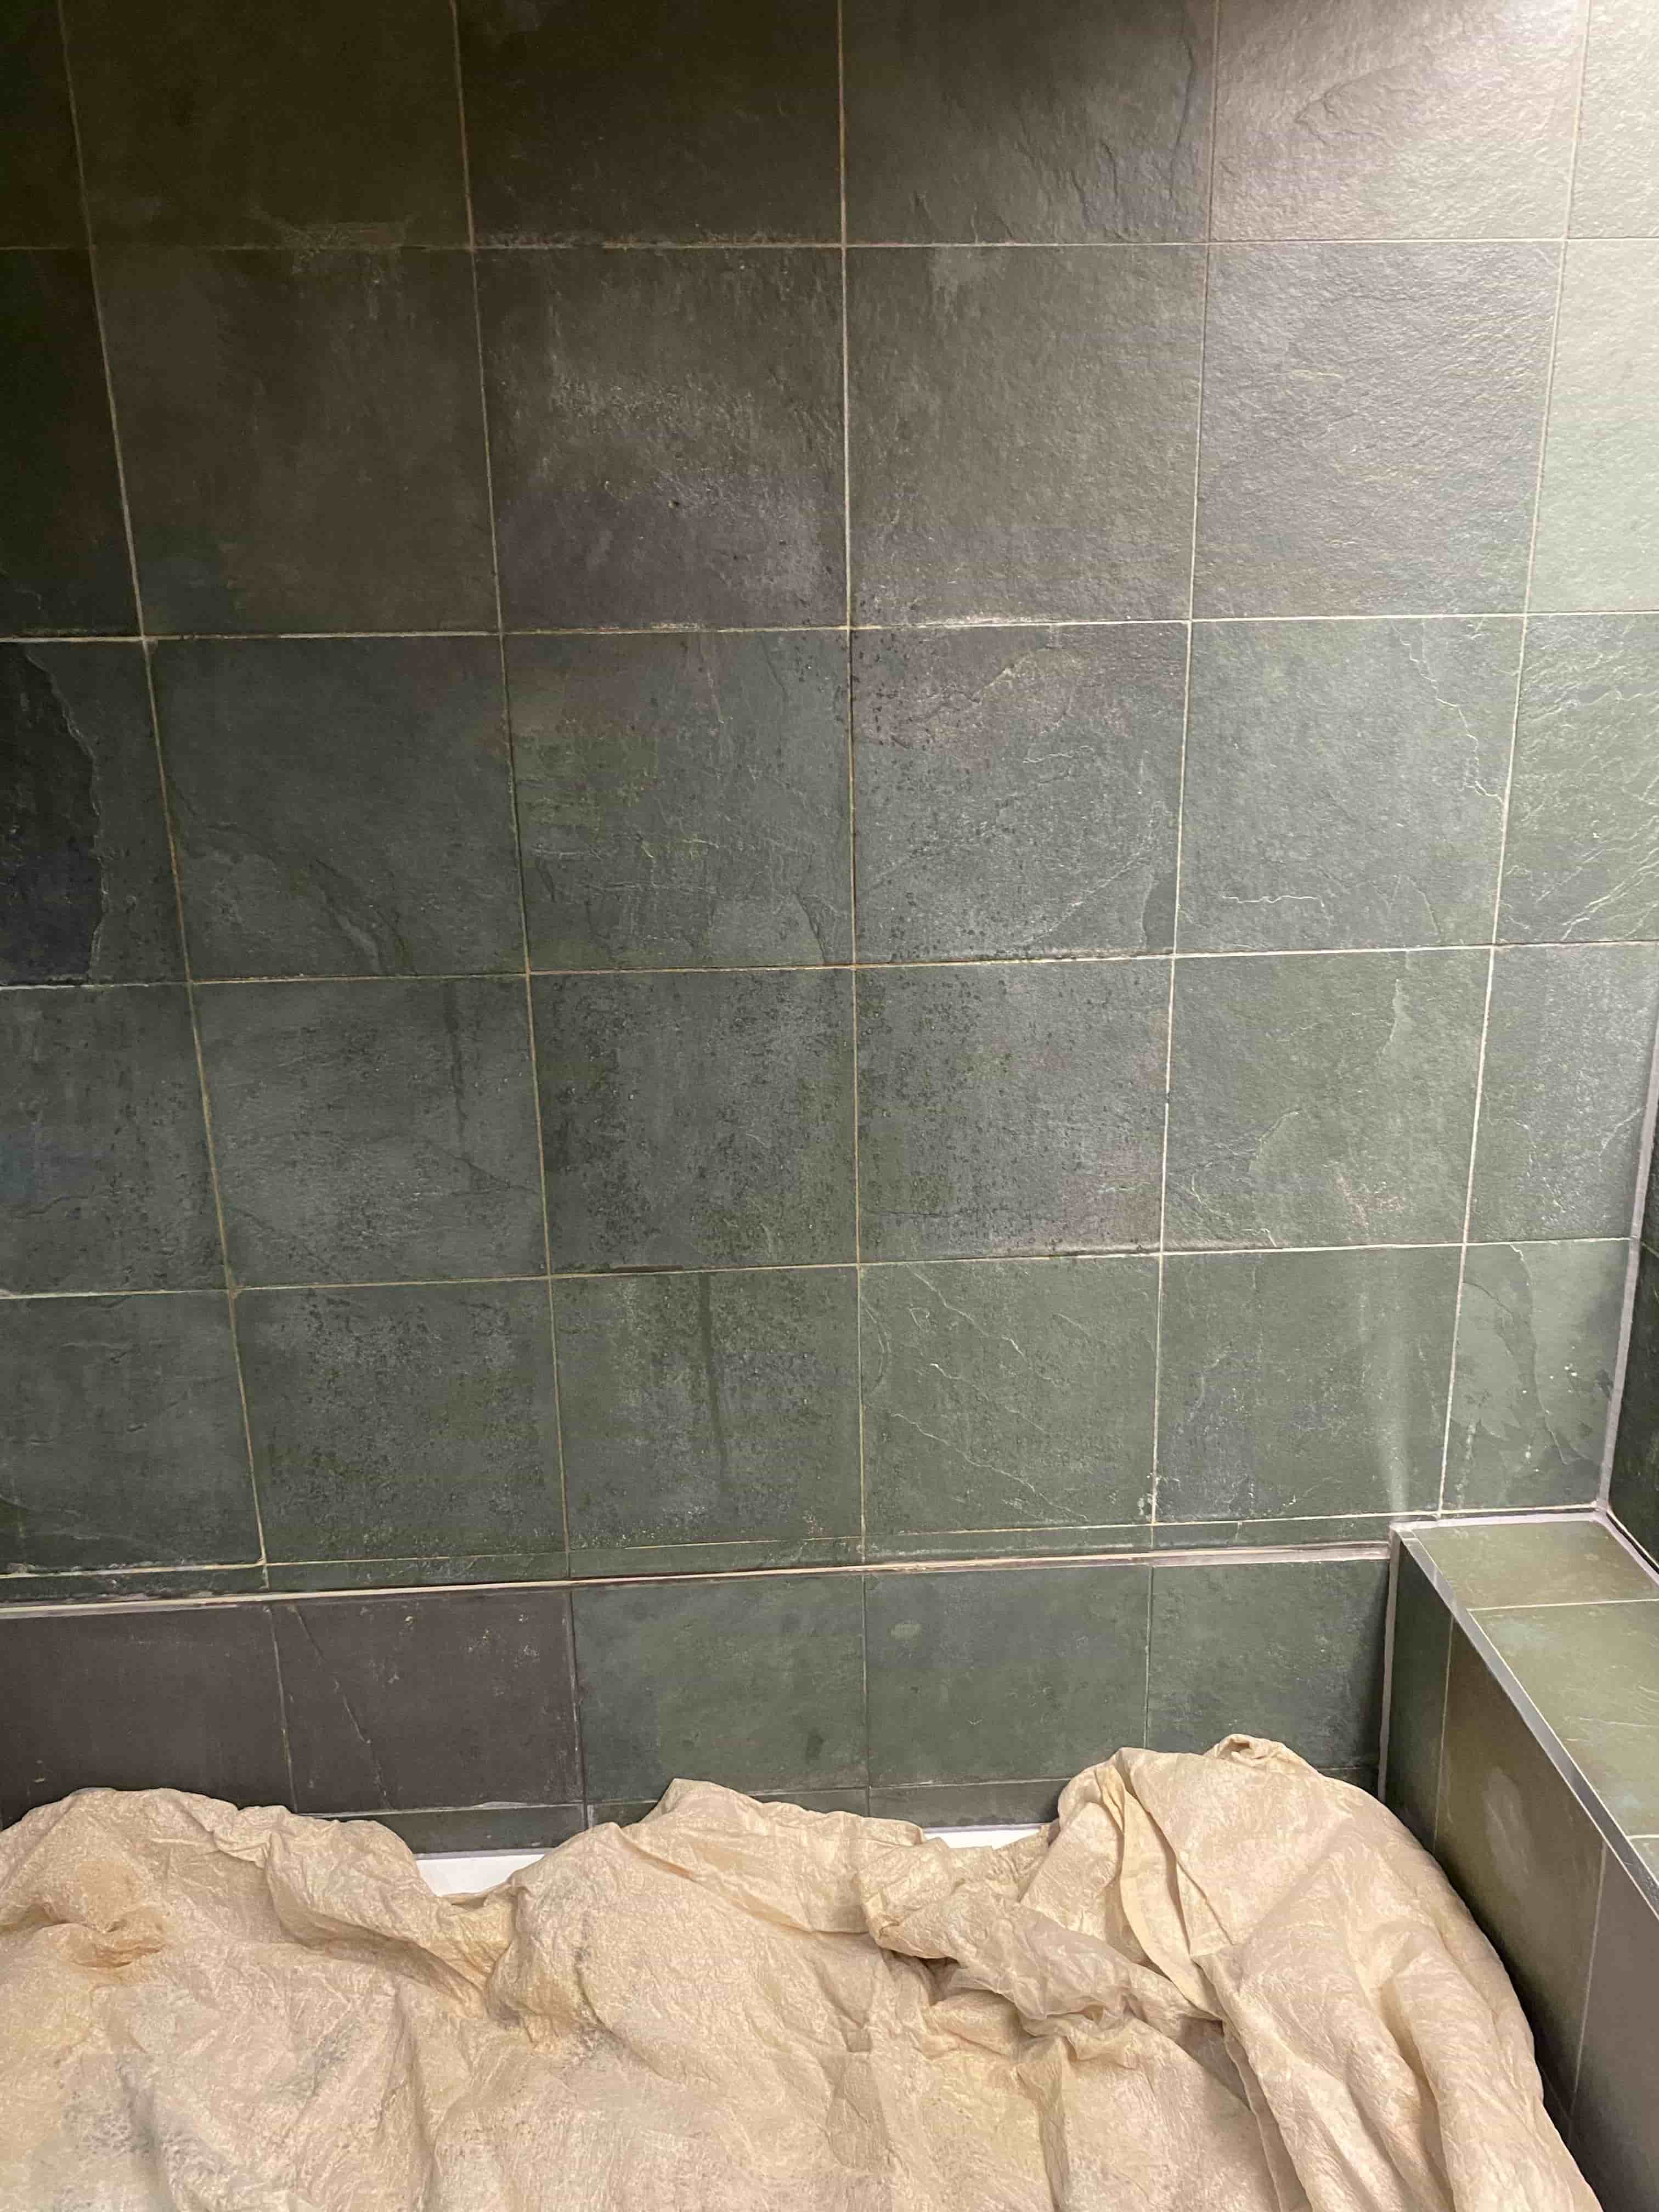
Slate Bathroom Tile Before Refurbishment Bermondsey

The main issue with the tiling which included the wall and floor was they had a lot of white marks on them. My client thought it was limescale, but he couldn’t remove the staining and hence contacted Tile Doctor. After taking a look at the Slate I informed him that the White marks were in fact what was left of an old topical sealer! It seems over years it had broken down and water had penetrated it turning it white.

Slate Bathroom Tile Before Refurbishment Bermondsey Slate Bathroom Tile Before Refurbishment Bermondsey

Removing White Stains from a Green Slate Tiled Bathroom

To begin I applied Tile Doctor Nanotech HBU Remover to the walls and floors, this is a heavy build up remover (HBU) used to remove stains and waxes. The product is quite thick which helps it stick to walls without running off. Its essential to give it a long dwell time so it can get to work breaking down the old sealer. In this case I left it for 45 minutes before scrubbing it into the tile.

Before rinsing I also applied Tile Doctor Remove & Go on top of the Nanotech as this is multi-purpose coatings stripper which removes old sealers. The Nanotech had softened and started to break up the old sealer, and I was using Remove & Go to get into the old sealer and lift it off completely, which it did.

I used a wet vacuum to pick up the soiled solution and then I a steam cleaner to rinse the tiles. I use steam for two reasons, firstly as I want to seal the tiles on the same day rinsing this way doesn’t soak the tiles. Secondly any remaining old sealer gets lifted out by the steam.

Slate Bathroom Tile During Refurbishment Bermondsey

Sealing Green Slate Bathroom Tiles

Later that day the Slate tile was dry and ready for sealing. I first applied Tile Doctor Colour Grow, which is a colour enhancing impregnating sealer that penetrates the pores of the Slate and protects from within. The sealer is applied with a cloth and worked into the stone, wiping off the excess and then leaving to dry for 30 minutes.

Once dry I then applied a coat of Tile Doctor Stone Oil, again this enhances the colour, but being an oil also improves the mechanical strength of the stone. This was left to dry, for another 30 minutes plus before applying another coat of Colour Grow. I always finish with a sealer as this helps to lock-in the oil.

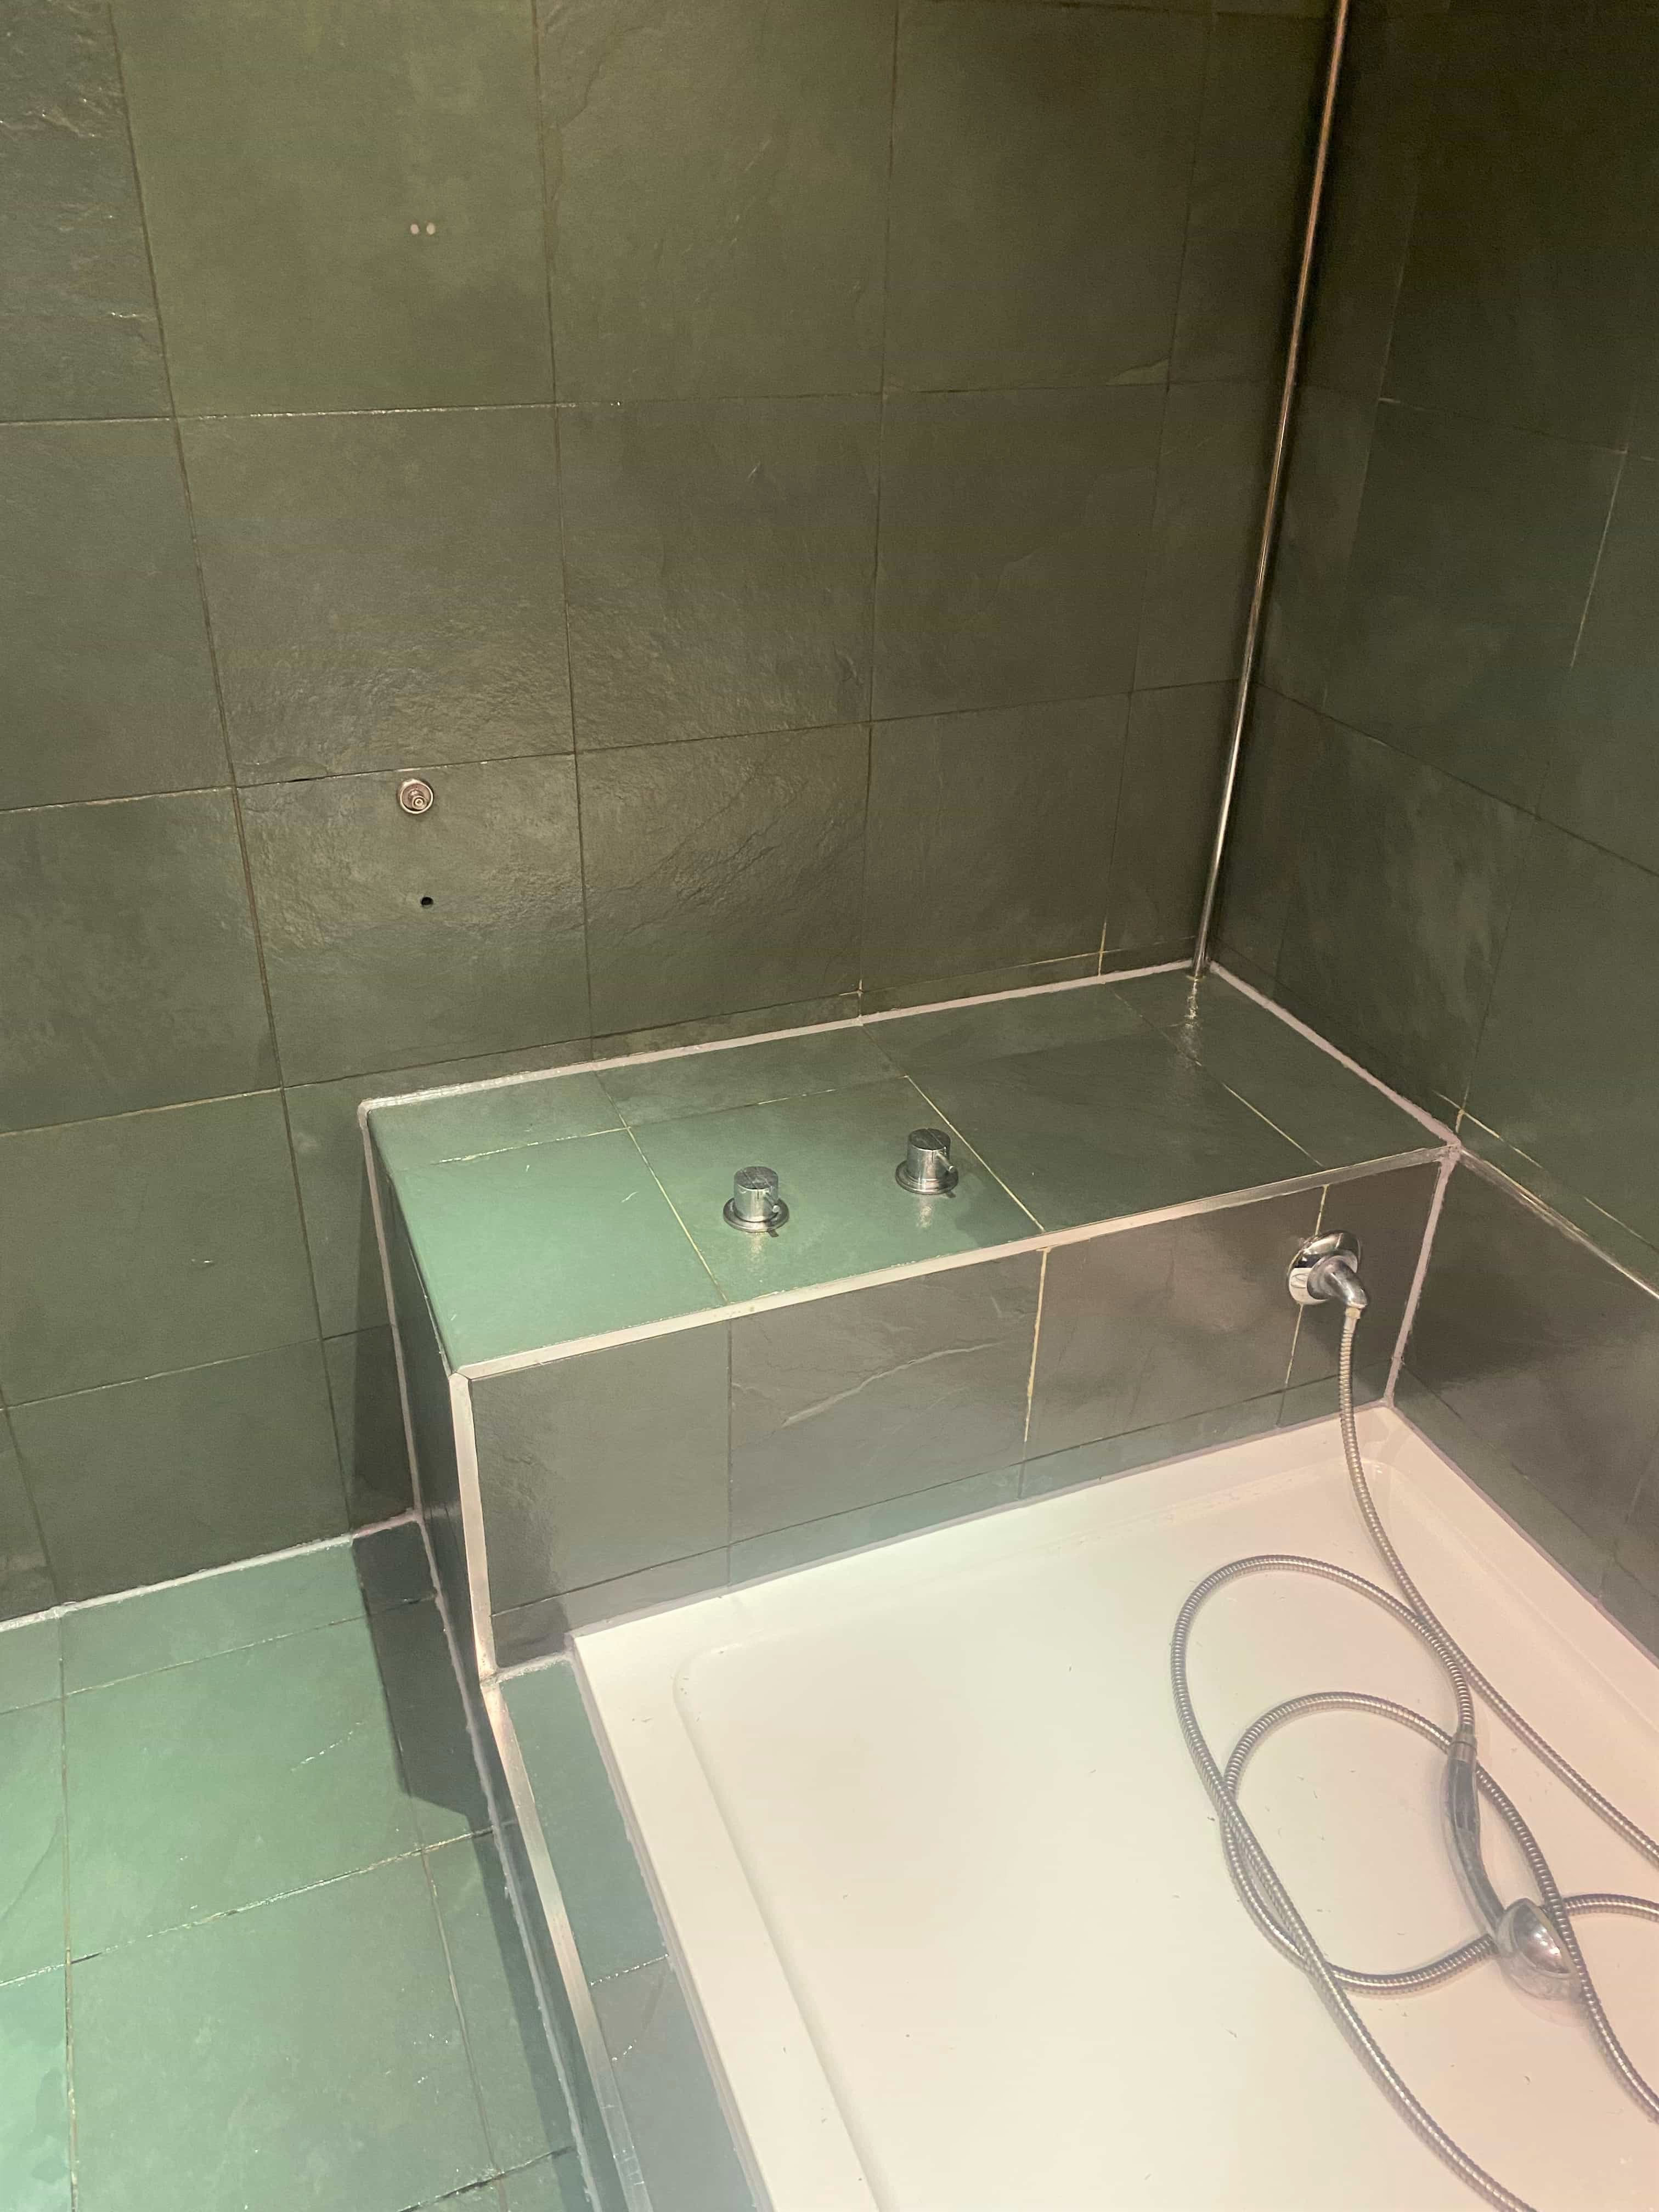
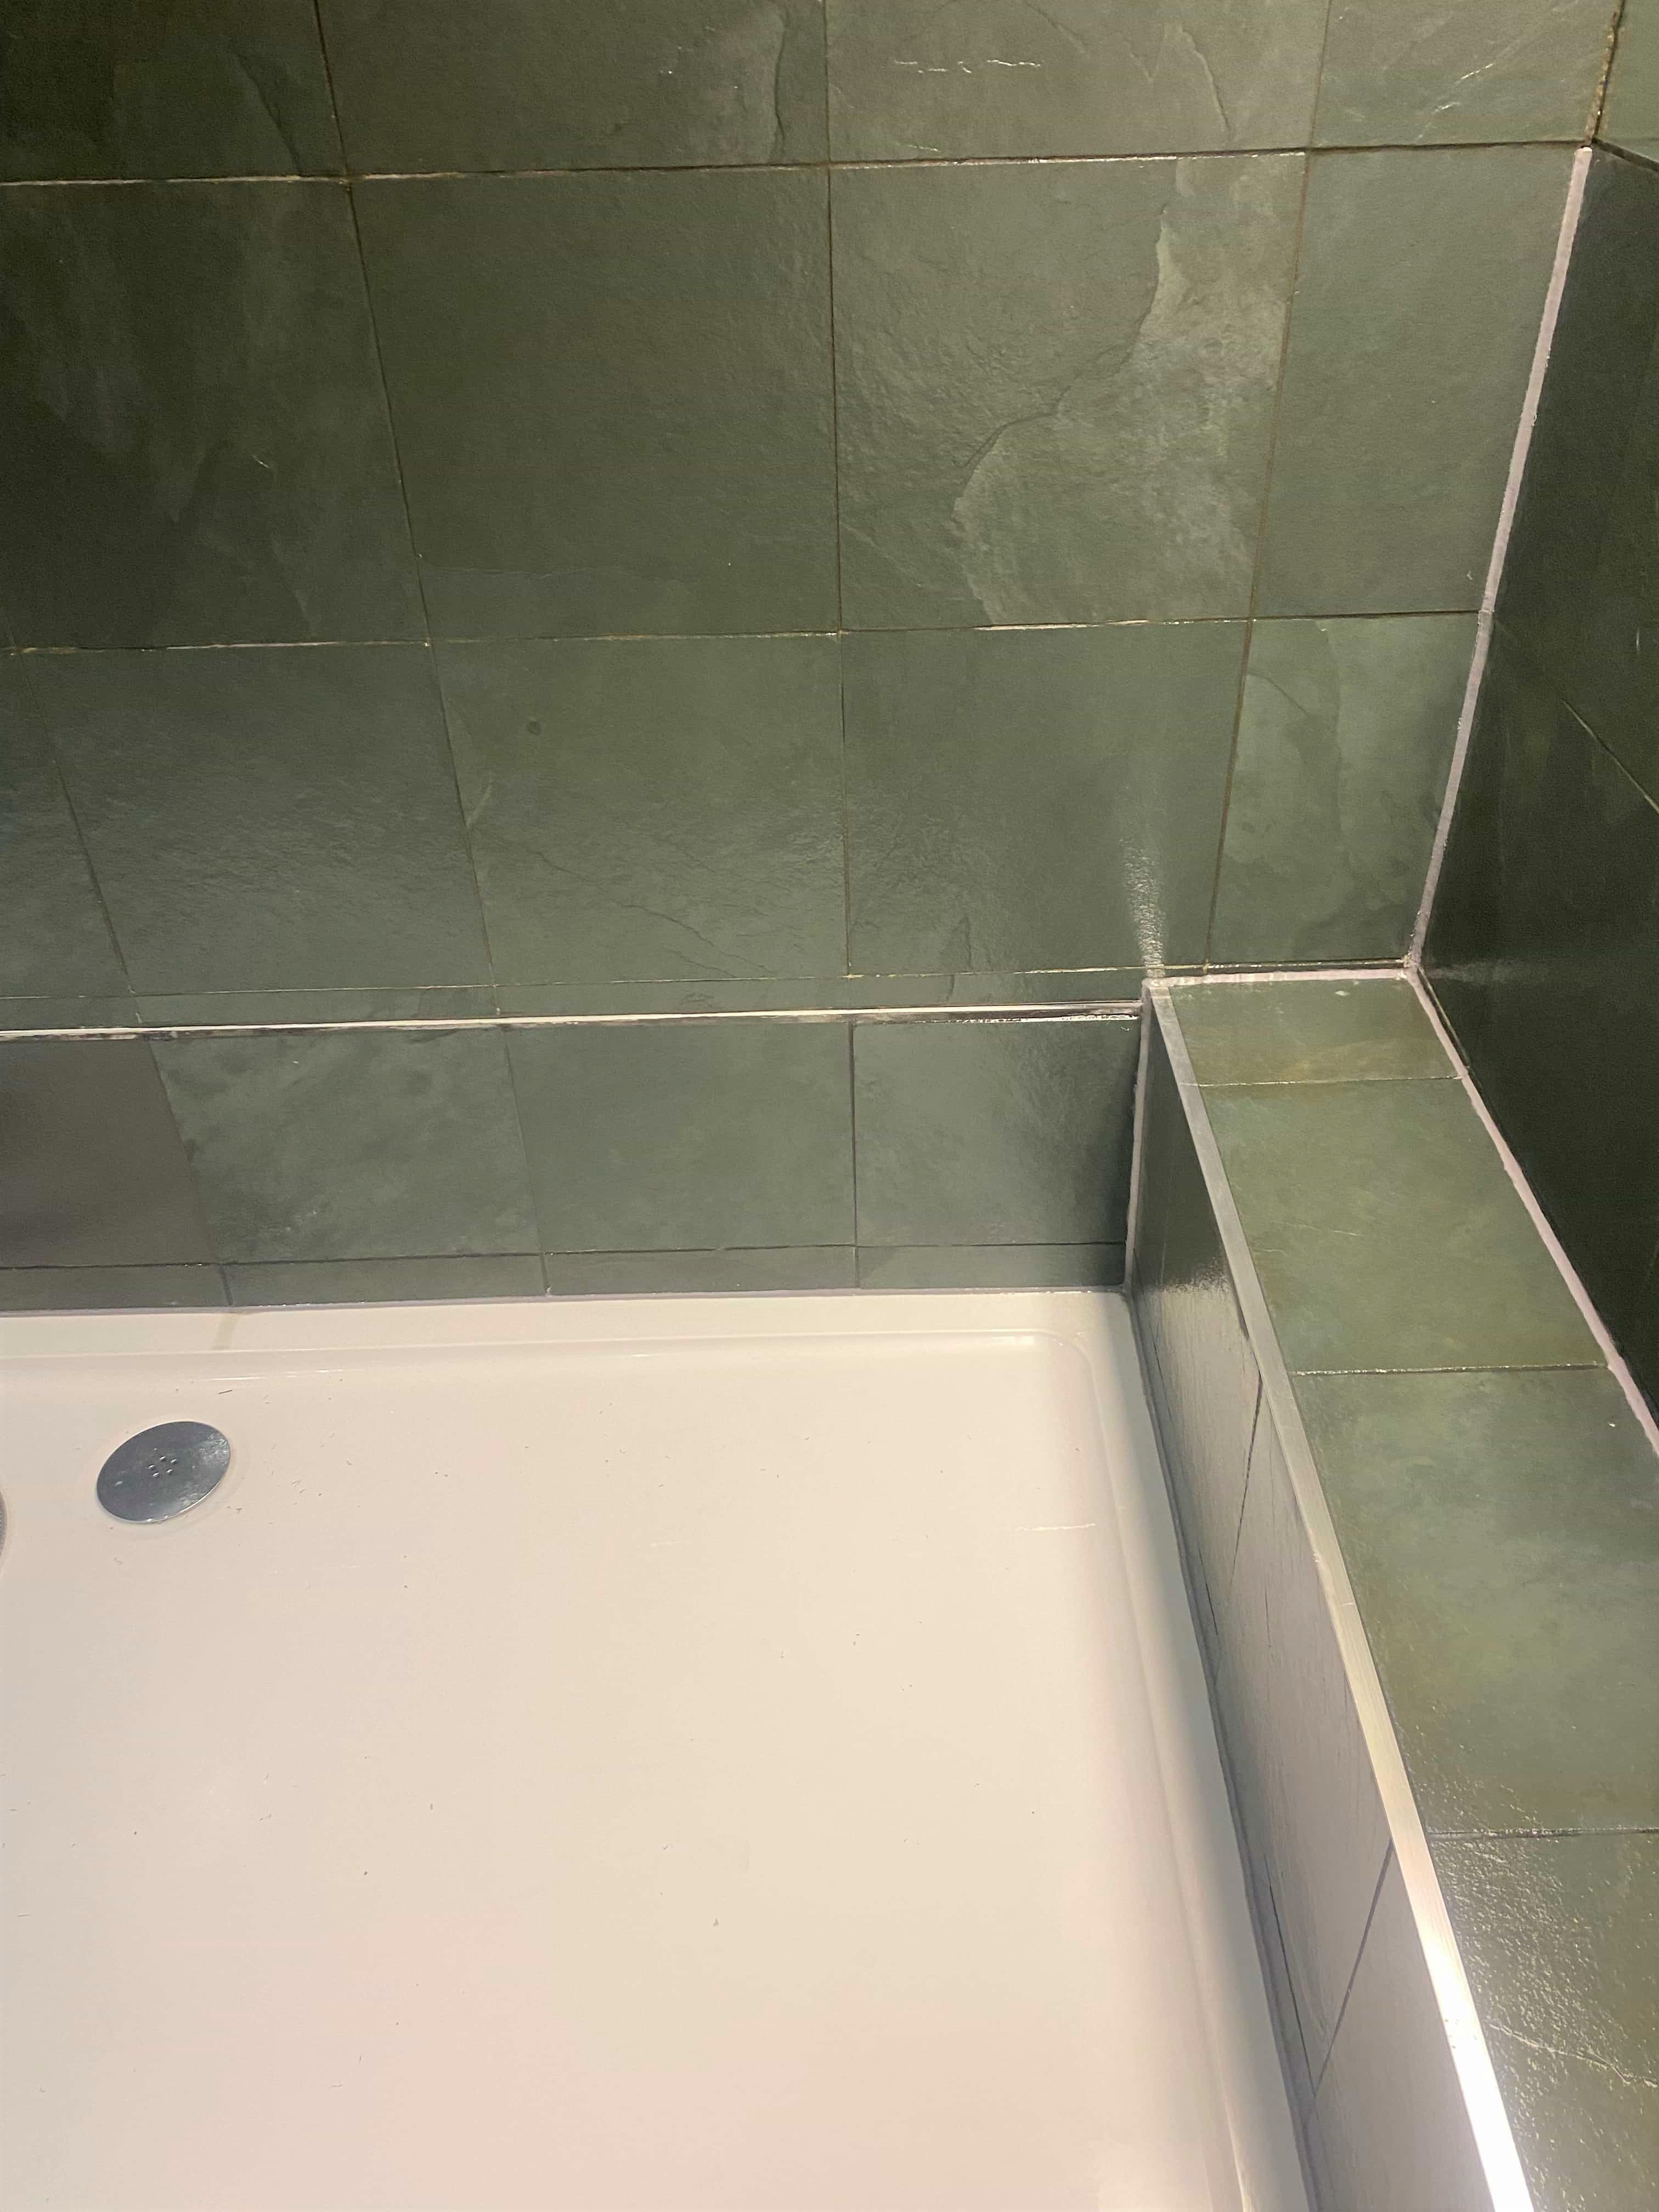
Slate Bathroom Tile After Refurbishment Bermondsey

My customer was very happy with the results and relieved to avoid the expense and inconvenience of having to retile the bathroom. Thankfully that is no longer the case, and the Slate has become a real feature of the bathroom.

Slate Bathroom Tile After Refurbishment Bermondsey Slate Bathroom Tile After Refurbishment Bermondsey

For aftercare of shower tiles, especially stone I recommend regularly spraying on a product called Tile Doctor Aqua-Pro which is a mild cleaner designed for use where the tiling has been sealed. A lot of tile cleaning products you find are simply too strong for use on sealed surfaces and can slowly erode the sealer over time.


Professional Slate Tile Restoration in a South London Wet Bathroom

Green Slate Bathroom Tile Refurbished in Bermondsey SE16 Read More »

Terracotta Conservatory Floor Renovation Herne Hill London SE24

Terracotta Conservatory Floor Deep Cleaned and Sealed in Herne Hill SE24

The following photos are of a Terracotta floor I recently worked on in the conservatory of a property in the South London suburb of Herne Hill SE25. The room was going to receive a makeover and they were not sure whether to replace the floor or not. The terracotta tiles were very dirty and although they had tried cleaning it themselves, they struggled to get a result so decided to call in Tile Doctor.

I went over to survey the floor and could see that any sealer that was once on the tiles had completely worn away and without the protection of sealer dirt had become ingrained into the pores of the tile. Once that happens it can be troublesome to remove deep seated dirt from within Terracotta due the porosity of the clay-based tile.

Terracotta Conservatory Floor Before Cleaning Herne Hill London SE24

However, having done quite a few of these floors previously I was confident with the right approach it could be deep cleaned and then a fresh sealer applied to protect it going forward. On the subject of sealers, they told me that they did not want a shiny finish so I quoted the job to clean and seal with an impregnating sealer that would meet their requirements.

I quoted for two days work, one day to clean and one day to seal and with the quote agreed the work was scheduled.

Deep Cleaning a Terracotta Conservatory Floor Tiles

On my return I started the cleaning process by applying a strong dilution of Tile Doctor Remove and Go combined 1 to 1 with Nanotech HBU Remover. Remove & Go is a multipurpose stripper with a long dwell time designed to remove old sealers and ingrained stains and the “Nanotech HBU Remover” is a heavy build-up cleaning product that uses nano sized particles to penetrate below the surface and draw out the ingrained dirt and stains.

Nanotech is a gel like substance and combined with the Remove & Go it makes for a powerful double action tile cleaning product. For maximum results It was left to sit on the floor for 30 minutes without allowing it to dry up or soak in. I then scrubbed the solution into the floor with a black scrubbing pad attached to a rotary floor machine. This action released the dirt from the tile and grout causing the cleaning solution to go black. The resulting slurry was then rinsed away with water extracted using a wet vacuum.

Terracotta Conservatory Floor During Cleaning Herne Hill London SE24

With the floor already looking significantly cleaner I moved onto the next step of giving the tiles and acid rinse using a 1:5 parts dilution of Tile Doctor Grout Clean-up. This product is a phosphoric acid based cleaner, which amongst other things removes efflorescence and lime deposits, being acidic it also neutralises the strong alkaline chemicals used to clean. I apply this solution by hand using stainless steel scouring pads for the tiles and a wire brush for the grout lines. I work in one metre square sections at a time, not allowing the solution to sit on the tiles for more than five minutes before vacuuming up the dirty solution.

One I had cleaned the whole floor with the “Grout Clean-Up” solution I then rinsed it with a steam cleaner. I use a steam cleaner for two reasons, for one it doesn’t soak the floor and the heat means it dries quicker and two any stains still there get drawn out by the steam.

Terracotta Conservatory Floor After Cleaning Herne Hill London SE24

Sealing Terracotta Conservatory Floor Tiles

It’s not good practice to apply a sealer to a damp floor as the dampness can cloud the sealer and result in a patchy appearance. Because of this I always seal on a second day and in this case, I left the floor to dry out fully for two days before returning.

To seal the floor, I used four coats of Tile Doctor Colour Grow which is an impregnating sealer that soaks into the pores of the Terracotta occupying the tiny pores and thereby blocking dirt from becoming ingrained there. Colour Grow as its name suggests improves the natural colours in the tile and in this case it did well to bring out the Orange/Red colours in the Terracotta, it also leaves a matt finish as requested by the client.

Terracotta Conservatory Floor After Sealing Herne Hill London SE24

For aftercare I recommend Tile Doctor Neutral Cleaner, sealers are vulnerable to harsh chemicals so its important to use a cleaner that won’t impact them. It’s always worth checking the small print when buying a cleaner as the wrong product can degrade the sealer and then your back to square one with the floor becoming dirty with ingrained dirt.


Professional Renovation of a Terracotta Tiled Conservatory Floor in South London

Terracotta Conservatory Floor Deep Cleaned and Sealed in Herne Hill SE24 Read More »

Damaged Victorian Step Before and After Restoration Chislehurst

Damaged Victorian Tiled Step Fully Restored in Chislehurst

This client in Chislehurst wanted to create a better first impression as their front Victorian tiled step looked tired and had been damaged by long term settlement in the sub floor. They ideally wanted to keep the original tiling but thought it would have to be replaced. The problem was that one section of the base had dropped and the tiling had cracked either side of this.

Victorian Tiled step Before Repair and Restoration Chislehurst

After visiting the property, I told the client that it could be repaired with matching reproduction tiles and fully restored. My client was happy with this suggestion, and they agreed to go ahead with my quote on that basis.

Victorian Tiled step Before Repair and Restoration Chislehurst

Repairing a Victorian Tiled Path and Step

Our workload has been busy this year so I returned as soon as I could and started by carefully lifting the tiles from the dropped section and all the cracked tiles that had been affected. Before retiling I had to underpin the original base and raise the level with new concrete. Once this was done, I left the property for a few days so the new concrete base could cure fully.

When I returned to the job, I set about fixing the replacement reproduction tiles in place laying them down in the same pattern as before, again these needed time for the adhesive to set so I left the property once completed.

Victorian Tiled step During Repair and Restoration Chislehurst

Restorative Cleaning of Victorian Tiles

I returned again a few days later to clean and seal the tiles. I first used Tile Doctor Remove and Go to remove any ground in dirt and old sealers that may be on the original tiles. As these tiles were outside and open to the elements, I needed to remove some blackening from the tiles and used Tile Doctor Patio and Brick Driveway Cleaner to get that off. I put this on the tiles and let it dwell for a while, adding water to it to keep the tiles wet. It was a small area so to help lift the dirt out of the tile I scrubbed the tiles by hand. Once done the whole area was rinsed with more water and the soil extracted with a wet vacuum.

The next step was to bring up the appearance of the tiles and remove further dirt with the application of a 100 and then 200-grit milling pad. These pads are applied with water for lubrication and do a great job of deep cleaning the tiles and hone up the face of the tile to ease the sealing process. It was a small area, and the weather was good so it wasn’t too long before I could move onto sealing.

Sealing a Victorian Tiled Path and Step

When the tiles were dry, I applied two coats of Tile Doctor Colour Grow and then once this had dried, I applied a coat of Tile Doctor Stone oil. Both these sealers are impregnators, which soak into the pores of the tile to enhance the appearance and natural colours of the tiles.

Victorian Tiled step After Repair and Restoration Chislehurst

It took a half few days to fully restore the path, fortunately Chislehurst is very close to my base in Bromley and so I was able to do some other work in between. The step looked new afterwards and my client was very impressed with the completed job.


Professional Restoration of a Victorian Tiled Step in South East London

Damaged Victorian Tiled Step Fully Restored in Chislehurst Read More »

Scroll to Top